Monday, February 28, 2011

Let there be light!

After scoring a great deal on our appliance package for the Ugly Duckling's kitchen we celebrated with a ...ahem, quick trip to the blue box store next door. You know, to pick up a few little things we needed for projects that day and to browse the aisles for inspiration.

Not only did we find a water closet (aka "crapper" in plumber language) at a great price, we also picked up a set of 2 outdoor lights for our Ugly Duckling.

[Ugly Duckling with new porch lights]

Yeah, not like that was planned or on the project list for that weekend, but the price was good, the design is a classic carriage design in black and on top of that they are motion-activated for a first security feature at our house. We also love how it affords you helpful light without having to fumble for a light switch when you come home in the dark and are searching for the right key on your key chain.
[Close up!]

Back at the Ugly Duckling, the husband went right to work. Taking down the old outdoor lights (we had 2 jelly jar fixtures, one with shade and the other without) was easy and so was wiring and hanging the new ones. I think even the Ugly Duckling was happy about the sparkle the new lights added. Now we're on the hunt for a matching pendant light since there's another ceiling fixture on our porch.

[Ugly Duckling by night]

Sunday, February 27, 2011

Knob Mission

I don't know what it is that makes people paint wall paint over switches and other fixtures. It's a fairly easy process to take off existing hardware or, if that's too much to ask for whatever reason, to tape it off. The end result of your paint job is so much cleaner and nicer if you don't end up with gobs of paint covering your light switch or grate or door knob.

Originally all of the old door knobs in the Ugly Duckling were a shiny golden brass. Ugh, brass ... so not my thing but I do love the old knobs and their lovely detail. Unfortunately past generations of owners and tenants had painted them over so they were quite messy to look at, not to mention the detail that was lost. Replacement costs for any one of these door sets start around $90 and go up depending how fancy you like it. So for us and considering the sheer number of door knobs it was spray paint to the rescue!

Before: Lovely door knob in all its painted-over glory [it's the knob of the guest bedroom closet, in case you're curious]

Step 1: Remove as much old paint as possible. If you're concerned about lead paint [and it's an old house and it's good to be concerned], simply rub the handle with a bit of paint de-glosser. This will remove some of the paint, even out bigger globs and drops and prep the surface for its new coat. Tape off the door knob and escutcheon to make sure you won't get primer and paint on your door and/or surrounding wall. I cut a rectangle slightly larger than the door knob into a sheet of newspaper and taped around the edges. Prime it with black automobile primer for a long(er) lasting finish.

Step 2: When the primer is dry the door knob if ready for its second coat. I picked up a can of Oil Rubbed Bronze spray paint [same company as the primer] since I love the deep color and it's all the rage, coincidentally. Spray paint the knob in light even coats.

Step 3: Remove tape and paper and admire your handiwork! Ohhh, pretty! Rinse and repeat. Find other areas to spray paint :o)


Saturday, February 26, 2011

Work in progress - the guest bedroom

One of the things on our must-have list was a guest bedroom dedicated to that exclusive purpose. Not a sleeper couch, not a catch-all room, but a real guest bedroom. Both, the husband and I, have family spread out all over the place: his over this continent and mine all across the ocean in good ol' Germany, and we like having them visit and stay. Being able to provide them with a comfortable room means a lot to us and was non-negotiable. So after painting the Little Man's Cave we proceeded to freshen up the guest bedroom.

Mrs G had already taken care of the windows in the room. Weights were restrung and locks refitted and she even took one sash to the shop to give a thorough once-over. Now they work like new! [Sorry for the not so great "Before" picture]

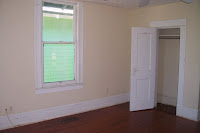
Here's what we started with: a cute but bland bedroom that gets great light through two big windows and features one small closet. When we brainstormed what we wanted the room to look like we ended up with a silver-blue and white color scheme with dashes of black for contrast. [You can find the mood board here]

After some deliberating we choose Dutch Boy's "Silver Slate" for the wall color and went to town. The ceiling received a coat of Ultra Pure White which is our default white for the Ugly Duckling.


[After: fresh paint on ceiling and wall and trimwork prepped and taped for painting]


[The other side of the room with view of the hallway through the open door. The smaller door is the closet door]


What a change! We fell in love with the color all over again once it was up on the walls. It doesn't overwhelm, it is light and airy which we felt was important for the room since it's a bit on the small side and it makes all of the trim really pop!
As an added side effect it works at all times of the day in the room: in the morning it is the truest ,a soft silver grey with a hint of blue to give it body, during the day it gains a periwinkle blue hue and in the afternoon when the settling sun reflects from the hardwood floors it appears almost lilac. Love!

Friday, February 25, 2011

Bathroom Dreams

Work is progressing steadily and the first couple of orders are delivered to their final destination: the Ugly Duckling.
The arrival of my super special clawfoot tub was delayed by two days thanks to obviously atrocious weather up north. Instead of Wednesday, it arrived, finally, on Friday (2 weeks ago)!

[Not in an envelope but Fedex-ed all the same]

[First peek - look at those curves!]


[My, are you pretty!]


There she is, waiting for the plumber to rough in the lines for the funky telephone faucet and the drain sometime this week. It was well worth the wait - it's exactly what we wanted for our master bathroom and came at a spectacular price.

One step closer to an actual bathroom!

Thursday, February 24, 2011

Curb Appeal II

Occasionally we take a break from painting inside and dabble a bit on the outside of the Ugly Duckling, especially when the weather is nice and sunny and warm. We haven't made any huge changes yet but it's the little touches that really are starting to make a difference.

[Before: Notice the wrought-iron handrail in the middle of the steps]

We really don't like the current wrought iron railing and handrail on our porch. It doesn't fit the style of the house, it's too insubstantial and too flimsy and not our style to boot. Long story short: it's got to go. We started with the hand rail saving the remaining railing for a later project.

[After: Ahh, so much better!]

Here's the husband with his two helpers. We needed some rust eater to help loosen one or two of the screws but the handrail came off without too much of a fight.

We also removed the first of 2 satellite dishes on the front right of the house. This was quite an adventure requiring a taller ladder and a smart approach to keep the dish from whacking the husband over the head upon coming down but we did it! This also allowed us to get rid of some of that cable mess at the front right of the house. The second dish, however, is proving a bit harder to reach. Looks like we'll need an even taller ladder.

I also planted the first few plants. Since half of the front yard is always in the shade I got our house some Hostas and a couple of Lily of the Valley. Both are shadow lovers and should do well in their new spot. It's been a couple of days since I planted them and they seem to have settled in nicely. Now it's up to them to spread out and be merry!

Wednesday, February 23, 2011

Ding Dong, the stack is gone!

After happily discovering the original pocket doors inside the walls of the living room it was only fair that we would find something not quite so fun in the walls somewhere else, I guess.

Enter the stage: the drain-waste-vent system, short DWVS, also called "The Stack". This is the center pipe of your house's plumbing system connecting your vent at the top of the roof with the sewer at the bottom. This is the way your waste (grey water and unmentionables from your toilet) drains down and gases vent out the top.

[source: Wikipedia]

Despite a decent amount of visible new-ish PVC piping we discovered during the demolition phase that the Ugly Duckling still had its original cast iron stack. Its original 95 year old cast iron stack. Now, there's nothing wrong with having a cast-iron stack per se. In fact, it's well-known for its reliability, sustainability and longevity but 95 years are 95 years and a quick googling around showed that the estimated lifespan averages about 80 years. That put us at 15 years past the expiration date and a little frown on our contractor's face.


[Meet our stack]

See, the problem is, it's hard to tell from the outside whether your cast-iron stack is in ship-shape or not. Unless an issue is staring you right in the face (cracks, corrosion or Lord have mercy, a very obvious leak) your stack could look great on the outside and be brewing trouble on the inside. The mental image of having our ...ahem, waste burst through a pipe -within- our house's walls was enough for us to bite the bullet and sign away a couple of hundred dollars to remove this original feature of our house and replace it with something younger and fresher.

We are blessed with a great contractor team, though, and they decided to check the stack out after all. Maybe it was still in great shape and we could use the saved money on something else? Something fun, like a restored staircase? So we played whack-a-mole upstairs were shorter sections made it easier to open up one part for a quick peek and easy replacement.

[Here're Mr P and the stack after hacking a hole in it]

Yeaaah, see that stack? Notice how the center appears to be solid? Solid as in "nothing can go down" (or up)? Basically our stack was filled with corrosion on the inside and some parts of the walls were worn down card-board-thin. It -really- needed to be replaced.

[Come a little closer: a rusty corroded mess]

[Oh, and this? This is the lead from between the joints of the stack.]

[Ding, dong, the stack is gone: looking up from the first floor all the way to the roof]

Until the plumber gets to the Ugly Duckling to re-plumb our house we're left with a gaping hole where the stack once was but at least we're well on our way to a DWVS that won't explode inside our walls the moment we flush the toilet for the first time. You know, if it would have taken that long for us to notice that there is something seriously wrong with our plumbing.

[Yes, that is a big crack in the stack]

So far that's the scariest surprise our Ugly Ducking has thrown at us. Not bad for a 95 year old house that hasn't been your average well-loved family residence for most of its lifespan.

There's one scary spot to explore left: What's hiding underneath all those layers of linoleum in the hallway and on the landing of the stairs upstairs?

All done!

Done!
Finished!
Checked off the list!

The Little Man's Cave is officially done and all that's left to do is mop the floors and windows and move in furniture and stuff and add window treatments.

Here's what we started with


[Before]


We scraped loose paint, removed old hardware, filled holes, sanded, replaced and repaired window hardware (thanks to Mrs G of our contractor team), spackled, taped, caulked and painted everything.

[After]
Here's the list of paints we used:
walls - Glidden's "New Grass Green" in flat finish
ceiling & wall - Behr's Ultra "Pure White" in flat finish
trim - Behr's Ultra "Pure White" in semi-gloss finish
stripes - Valspar "Boat Blue" in satin finish
door knobs - Rustoleum ORB spray paint in satin finish
Kilz primer

Now comes the fun part for this room: decorating and moving in :o)

Tuesday, February 22, 2011

Curb appeal I

Since the weather changed to Florida Spring Mode last week, we'd been itching to work on a few minor changes on the outside of the Ugly Duckling. The weather has been gorgeous (of course, now that the roof is all fixed) with balmy temperatures and sunny skies and working out of doors sounded like a great idea. We didn't do anything big. We just tidied things up a bit.
[Before: check out the white cap stones halfway up the porch columns]

There's the husband prepping the capstones. With everything being all white except for the porch floor, steps and lower capstones the porch seemed to be floating in mid-air. So, armed with a gallon of dark grey exterior paint, a broom and some gardening tools we went to town.
First, we cleaned up the weeds creeping up between the pavers leading up to the porch steps. It's something my Mom made us do a lot when we were little and it's like bicycle riding - you don't forget the motions. Heh :o) It looked much cleaner right away, too.
Then husband started to clean and prep the cap stones of the columns while I hoe-ed away on the clumps of patchy grass growing up against the front of the porch.

[There he is, de-glossing the capstones. The lower ones were painted grey but showed paint splatters from projects of the previous owner so they needed a clean and matching coat of paint too]

The grey we picked up is a much warmer grey with a lot less blue. It went on like butter and gave the porch a bit more 'oomph' - just what it needed. There's plenty of paint left - enough to paint the porch floor and steps once we've refinished the porch floor a bit (like filling little cracks and holes left from the railing)

[In progress: Cap stone painting in progress]

I'm thinking about tinting some white exterior paint with a sploosh of the grey we used on the cap stones to paint the bottom part of the columns. That should help ground the porch even more and give it some more substance.

Stay tuned for Curb Appeal II - the sequel !


Saturday, February 19, 2011

Stripes

The work on the little man's cave is slowly coming to an end. If I can muster enough strength and enthusiasm today (I'm battling the flu and am drowning in snot ...yeah, I know, TMI) , I'll finish painting the window trim and doors and it'll be done!

Here's yours truly painting the stripes in Valspar's "Boat Blue".

The stripes turned out okay. The edges aren't quite as crisp and clean as I'd hoped (a little paint bled through despite sealing and using the expensive painter's tape) but for now it'll do. I have an entire house to paint and once I'm done with the rest I might come back for a round of touch-ups.

Stripey Goodness!

I was hoping to find simple navy-blue Roman shades for the windows in his room but all I could find so far are those tie-up shades which I think are a bit too frou-frou for a boy's room. I might go for matchstick blinds and panels instead, hanging them up against the ceiling to create the sense of height and to balance out the effect of the hung ceiling.

Thursday, February 17, 2011

A thing for knobs

The more time we spend with the Ugly Duckling, the more she reveals little things to us. There are things that need to be taken care of (the stack), things that need to be "babysat" (the roof) and things that simply need some freshening up and cleaning (everything else) but every once in a while, amid this truckload of work, I discover those little details that make this house special to me 9and so far has proven to be rather elusive on camera - maybe the house is simply photo shy, who knows?).

While painting the little man's cave I noticed that his door knob was different from any other I'd seen. At first passing glance I thought it was simply caked on paint until I looked closer. Under layers of paint, a delicate filigree pattern was hiding in plain sight.

[Before]


[After]
Isn't it pretty? I simply reached for the deglosser and gently wiped down the front of the knob, and the paint wiped off fairly easily. It's a beautiful Eastlake style pattern. Of course, there's not one to match this one in the whole house and while I still have to snap pictures of a few more knobs to document all of the different styles, here're two more to entertain you in the meantime

Guest Bedroom
Master Bedroom


Wednesday, February 16, 2011

Down with the awnings

The Ugly Duckling came ... ahem, adorned with two metal awnings: one above the entry hall window on the right side of the house and another one above the kitchen window in the back. There is a lot to be said about the rules and regulations concerning what you can and cannot do to your house in a historic district but - Hallelujah! - metal awnings are considered a bad fashion faux pas and will no longer be approved unless they pertain to the style of your house (that'd be a Mediterranean or Italianate style house) . Our awnings were grandfathered in since they'd been added before Historic Springfield officially became a historic district, but they were ugly all the same and simply HAD.TO.GO.

I discovered fairly quickly that I couldn't reach them using my trusted stepladder and due to the fact that I'm a wuss when it comes to heights, I had to wait until husband had time to indulge me.

Last Saturday he did. He scaled the ladder and after liberal use of paint thinner, rust eater and a variety of hand tools he managed to remove the awnings. First, the one on the front right of the Ugly Duckling
Here he is, scaling the ladder. The equally ugly satellite dishes are also slated for removal. (We just need to bring the taller ladder over).

One down - one more to go! All screws were painted over and some were rusted into place so it took a bit longer and some more messing around with the whole set up than expected but we were determined (and I was cheering from the ground).

Bad ugly awning! Be gone!

Rinse and repeat. The awning above the kitchen window in the back came down a bit more easily.

After - so much better! As a beautiful (and not really unexpected) side effect, the kitchen is now so much brighter.

Tuesday, February 15, 2011

Meet Griswold

This is Griswold. He's from Pennsylvania, and after a short sabbatical he will be in charge of receiving the mail at the Ugly Duckling again. Griswold has been in this profession for many years and his experience is extraordinary even though he lost his outgoing mail clip and the newspaper hanger at some point in the past 70+ years.

"Griswold" is a Griswold Erie, PA No 106 cast-iron mailbox. Right now he resides next to the formal entrance door that leads to the living room (the door was moved from its original place most likely when it was turned into a duplex the first time around) but we will move him over to our actual entrance door and return him to "mail duty" because we love his quirky looks.

Don't you love his squint and perpetual "oh" mouth? We certainly do!

Monday, February 14, 2011

Happy Valentine's Day


We've had a long weekend with lots of little projects here and there and there're other changes that deserve an entry but today is Valentine's Day, folks!

So love on your BFFs, boyfriends, spouses, children and everybody else who could use some love and don't forget to love your house as well :o)


Friday, February 11, 2011

Meet my sink

Last Saturday I escaped for a quick trip to Orlando, catching up with a couple of girl friends during a brief visit a bachelorette party and going on a husband-sanctioned shopping spree at IKEA.

You see, my kitchen design revolves around that clean vintage image of white shaker-style cabinets and a big honking sink. It tickles me pink that that is also the style that would have been en vogue for the Ugly Duckling back when it was brand new and shiny

[1920s kitchen, source: antiquehomestyle.com]

Big sinks, especially those fancy apron sinks, don't come cheap but IKEA comes to the rescue in this case: their Domsjo sink comes in 3 different sizes ranging from cute small prep sink over the great single-bowl to the humongous double-bowl.


[Meet my sink: Domsjo single-bowl sink]


So I drove down to Orlando, picked up my sink [danced a quick happy jig that it was in stock] and used the opportunity to chat with one of their lovely IKEA kitchen designers about the revised layout for our kitchen and the order process. Our contractor had made a couple of good suggestions and we've decided to 'flip' the kitchen around. Now the sink will be underneath the window and we will have room for a built-in breakfast nook on the other side. Kind of like this one here

[1920s kitchen, source: antiquehomestyle.com]

Now all we need is electricity at the Ugly Duckling. Oh, and a working toilet would be great :o)


Thursday, February 10, 2011

Stripey goodness

Slow and steady!Painting the Little Man Cave is progressing nicely, all things (experience, practice, available time) considered. Every day after work I change into my work clothes, grab a bite to eat and head over to the Ugly Duckling to work for 2.5h until the school bus drops off the Little Man in the afternoon.

Our first coat of New Grass Green needed a second coat for nice even coverage. It's bright and cheerful and oh, so very green! I really love how lively it contrasts with the bright clean white of the ceiling. I can't wait to paint the stripes though.

[Glidden "New Grass Green"]

Yesterday I measured and taped the stripes. I went with the thickness of the base molding (10 inches) and ruled out stripes until I ran out of space. No, I didn't measure the entire length of the wall (I knew it was somewhere around 8 feet), I simply winged it which tends to be my preferred method. I guess I got really lucky when I ended up with the last blue stripe lining up almost exactly flush with the top of the door molding. Score - me!

[The feature wall with the closet door and taped stripes]

Weather in NE Florida has been on the nippy side since the rain let up and it turns out that blue painter's tape doesn't do well in cold weather. It'll stick to itself so badly that it's hard to roll it off of the roll. So, I stuck it into my pants ... heh (the back pocket - sheesh!). That did the trick. After a short while it unrolled just fine, and I managed to get all stripes taped.

[Little Man's closet]

Today's fait accompli was priming the base molding and trim work around windows and doors. I don't know about you but while I'm a rather accomplished painter on paper, using the big brushes and painting rooms is something I definitely will need more practice (and there's no doubt I'll get plenty of that). Either way, freehanding the base molding wasn't going to happen. Blue painter's tape to the rescue! Now there's bright white clean-looking trim in the Little Man Cave waiting for tomorrow's painting with Behr's Ultra Pure White in semi-gloss. Stay tuned!

Wednesday, February 9, 2011

Big steps - little steps

Learning to dance an Old English Folk Dance we loved to imitate our dance teacher's "BIG step, BIG step, leeetle step, leeetle step" with a slightly exaggerated Eastern European accent. Our contractor's warning that the beginning and the end of a rehab feel like a whirlwind and that the middle seems to drag, somehow follows the same idea. Looks like she's spot on, too :o)

Right now, things are dragging a bit. Our electrician is working at repairing, updating, moving and installing fixtures and outlets so that electricity can be restored to our Ugly Duckling. This is such a lengthy process [most likely a week] because the Ugly Duckling has been vacant for so long that JEA requires a re-inspection before turning on the "juice" again. Until then, all carpentry work and any work after 5:30pm is on hold because you can't use any power tools and it still gets dark early.

We got bids for the HVAC system which of course turned out a little higher than we'd hoped because code now requires that the compressors are at least 4 ft from the next house. That means the one that was installed on the right side of the house needs to move into the backyard and copper lines ain't cheap.

Plumbing will be equally fun since we discovered that the original cast-iron stack is still in use. As we're vehemently opposed to "shit hitting fan" moments in the near future should that stack decide to rust through on us, we'll have it replaced. After all, the walls are open and the plumber is already in the house. Right? Right.

In good news we have word that my super special tub beauty will be delivered today, the kitchen plans are finalized, my pretty pretty sink is here, the walls in the Little Man's room got their second coat of paint and the rain gave us a 2-day break (it'll be back for a brief stint tomorrow and then leave fo good).

Tuesday, February 8, 2011

The Little Man Cave

By now you probably think there is no stone left unturned and that my statement that the Ugly Duckling is basically livable (except for the gross kitchen and missing hvac system) is a major exaggeration. There are indeed areas in our house that only need touch-ups!

Case in point: The Little Man's Cave
[Before]
His room, the second largest after the master bedroom, only needs a thorough cleaning and a fresh coat of paint. Scratch that. It only needed a major cleaning and the little Man insisted on painting it his favorite color: green.

This weekend, after some prep work and painting the ceiling on Saturday, the little man and I went over to the Ugly Duckling to get started on his room. Anything we do in there won't affect any other area we're working on and/or are doing some form of construction so it's a great place to start.

Little Man choose Glidden's "New Grass Green" for his walls. It's a bright
cheery Granny Smith apple-green but it's not too overwhelming and it pops beautifully against Behr's Ultra Pure White on ceiling and trim work. We will add some navy stripes to his closet wall as an extra special feature (and so he doesn't feel like he's stuck in a green box)

[Little Man painting away]

With my trusted little helper by my side we actually managed to give all 3 walls a nice coat of paint. It's a great color but the starker contrast between ceiling and wall color does make the lowered ceiling more obvious [when the Ugly Duckling was upgraded to central heat and air, the owner unfortunately lowered the ceiling to make room for the necessary duct work, rather than running it through the attic or crawl space]. I do plan on painting the narrow part of wall above the window to match the trim and might try to bring the walls "down" by adding not too wide crown molding. Maybe the window treatment will ease the effect as well - we'll see!

[More green on the wall]

And again, here's the mood board for the room so you know where we are going with this. We have plans that include built-in book shelves and a daybed/couch for sleep-over guests in the Little Man's Cave. So stay tuned - there's more to come!


[created on polyvore.com]