Showing posts with label Bathroom. Show all posts

Monday, November 24, 2014

Quicky In The Bathroom

Upstairs we have two full bathrooms: our hall bathroom and the newly added master bathroom. Call it a bad habit that's hard to break but the husband hardly ever uses the master bathroom because he is so used to using the hall bathroom from when we moved in that he's not been able to break that habit for good. Means, I get the master bathroom, claw footed tub and all, all to myself!

I don't mind sharing with the husband at all, and all three of us did share one bathroom before we bought our little old house, but still ... it's nice not having to share with stinky, messy boys ;)

They also keep their boy bathroom clean-ish and so I don't have much reason to go in there, except for the occasional pilfering of toilet paper or looking for medication for Little Man.

That's how I discovered that one of my men had fallen victim to their Herculean strength and broken one of the hinges of the medicine cabinet. Well, actually it was the lopsided mirror that gave it away.

While I went shopping for a replacement, the husband tore it out of its wall cubby. That's when things got interesting in several ways

- drywall was damaged; what was supposed to be a simple switcheroo became much more involved - as usual, really
- the cabinet was shaped like a ... what's the word? tray ceiling starting large with the frame, stepping down a size and getting smaller, and then - surprise, surprise - taking the size down another step - the one we didn't measure until it was too late.
- Nobody seems to sell 'Dutch Boy' paint around here any more and I had to find a match or repaint the entire bathroom


Here's the hole in the wall in all its glory.
There was a moment's temptation to just by a large wall mirror, cover the hole, and call it a day.
Then I remembered the scathing hate we feel for all those crazy dumb quick fixes we unearth (me and my neighbours) throughout our neighbourhood - from caulk and duct tape in odd places to toothpicks and cardboard in even worse spots) and decided to put on my big girl pants and man up.


Thank God Athena was around to keep me on target! Here she is correcting my camera angle!

Some where along the way I forgot to keep taking pictures of the process. It was pretty straightforward though, no matter how tedious and aggravating I find drywall repairs. That dust gets everywhere and good repairs require a slow, careful layering of dry wall mud - there are only so many bumps and irregularities you can sand out, so it pays to take it slow.

Anyways, while the drywall repairs dried, I went off in search of a color match to the existing paint. I 'thought' I'd found it - the paint chip was spot on! in every light - but when I returned home with my can of paint, it because immediately obvious that the paint -in- the can was way too light.

Now what?

Well, I have an entire stash of testers in various shades of blue, so I sat down and started mixing my own 'match' - no kidding.
And the best of it? It worked!
Spot on!


All fixed!
No more hole in the wall and a nice clean place to put medications and bathroom stuff with a functioning door to boot!

Friday, February 1, 2013

On Tap Now!

Last time I talked about our hall bath sink, the husband and Little Man had just encountered the problem with the screws holding the old taps in place. They were rusted in place and no manipulation with our collection of wrenches, pliers and vise grips got them to budge. Gnnnnnnhhh ....

So we tried rust solvent ... slathered it on and waited.
Frankly, I'm not sure how much that helped.
In the end, the husband had to chip away at the rusted parts and finally managed to pry it apart enough to remove the old faucets.
Yay!

 [Inkybinky checking out husband's handywork - she is insanely fascinated by sinks]

Installing the new ones was a breeze and they are -lovely-!
They work so much better than the old ones, and of course they are shiny, new and sparkly!

Now I really have to check into having the sink professionally refinished. It got banged around a bit and now looks really worse for wear. I'll keep you posted how that goes.

[The menagerie follows me around all the time. Obviously you never know when Mom will start cooking dinner 
.... or turn on the sink ...or flush the toilet, and it's good to be nearby when that happens. ]

Thursday, January 24, 2013

That sinking feeling

 Here is where we are at with our new cross handle taps for the vintage sink in the upstair's hall bath

[Husband and Little Man assessing the situation]

Yeaaaah ... not good.

There are a few rusted screws that are giving us a hard time.


I'll keep you posted.

Promise!

Thursday, January 17, 2013

On tap(s)

No staircase news YET since even our normal Mondays, Tuedays and Wednesdays are crazy days, always jam-packed with school and work and homework and chores (laundry ...ugh) and sports and other activities and no time (and energy) to love on the house. Most of our projects happen on the weekends ... I did, however, go shopping, so here goes:

Shortly after we moved in and met our next door neighbor John, he gifted us with a vintage cast iron sink as a housewarming present. We were very excited about any vintage touches we could bring back into our Ugly Duckling House which had suffered many ... ahem, updates, some of which had removed a lot of its 1914s charm, and we gratefully accepted the awesome present!

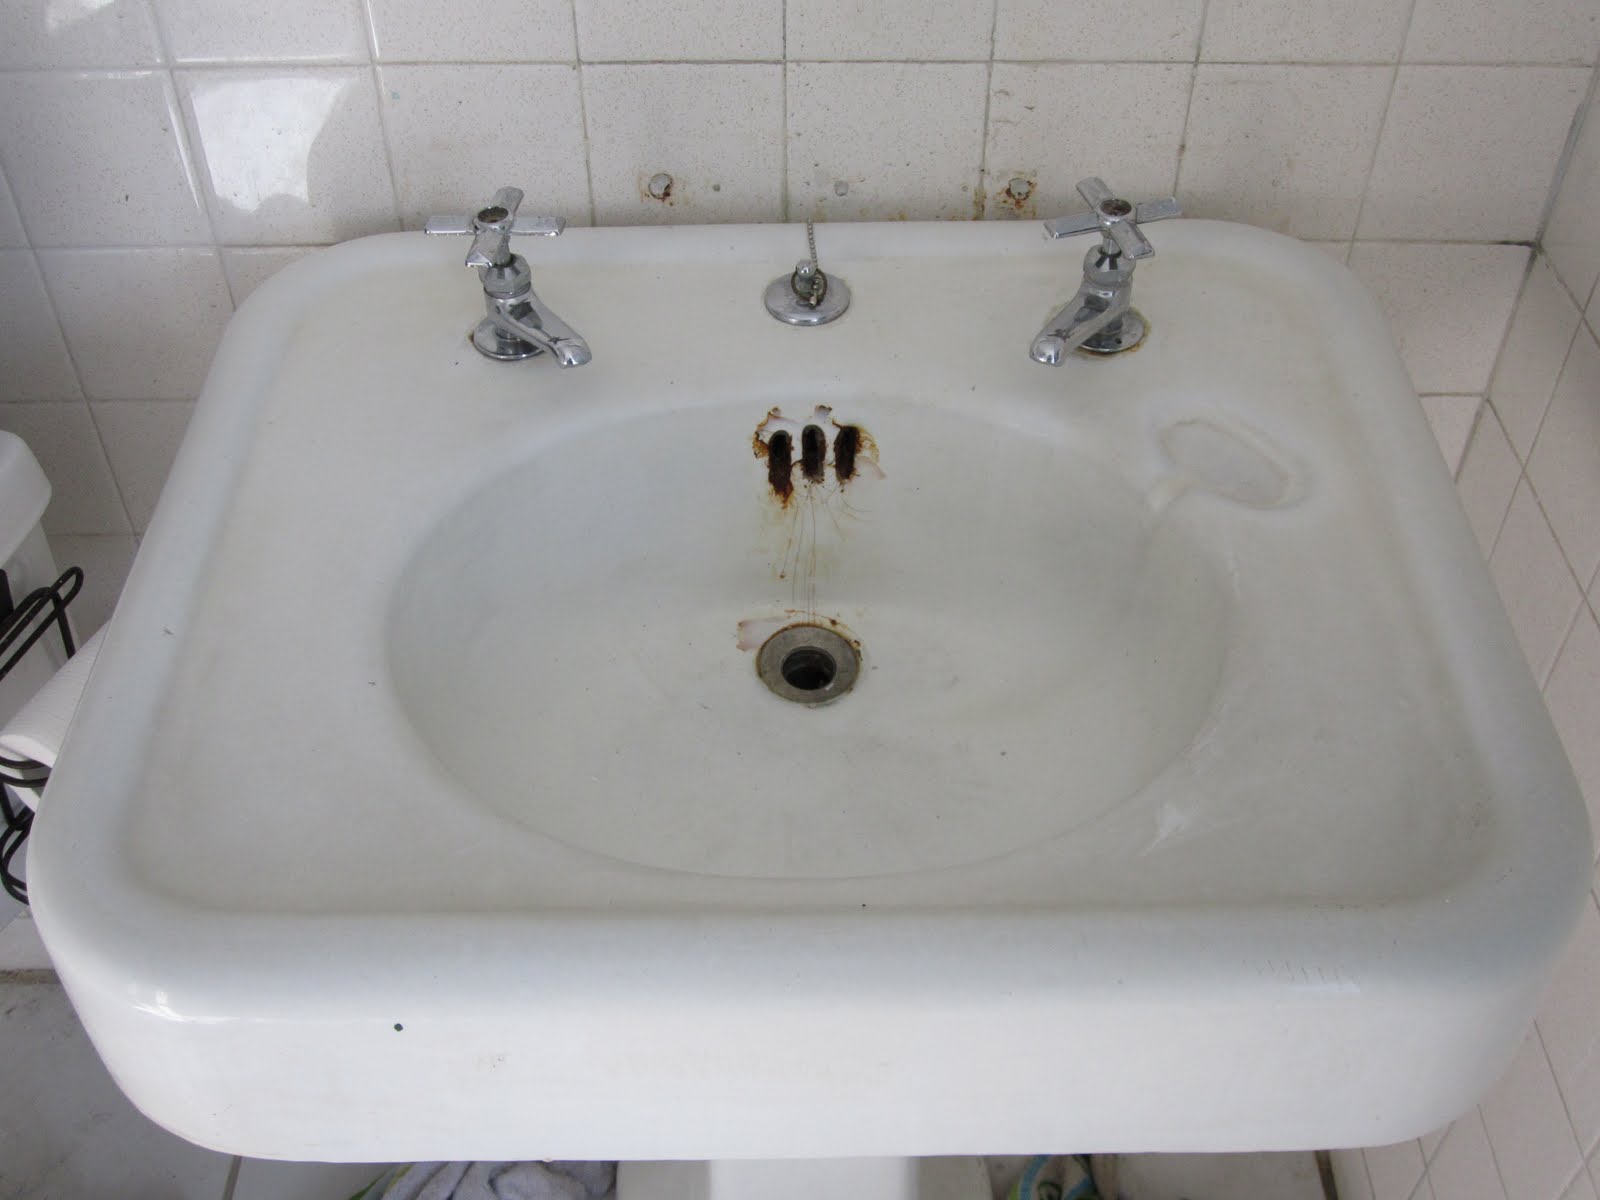
It weighs about a metric ton, takes two men (or one Sam) to haul up the stairs, and has quite a few years of service left. There is some rust around the drain and near the overflow, and I refinished it with one of those DIY kits from the box store The results were really nice and the new finish has held up over the past year, but slowly the rust is creeping through again This time I'm considering having it professionally re-glazed. I'm hoping that our awesome neighborhood sounding board has a good recommendation for me. It's one of those things I really love about my 'hood. Word of mouth is golden here.

Anyways, the vintage sink features a two tap set-up, one for hot and one for cold. Lately, these two faucets had started to develop 'issues.' They started to leak, and you had to crank them close really tight to stop the water from running. That was pret-ty painful because the edges of the handles are rather sharp, and finally enough was enough.

Time to go shopping!

Taps are more difficult to find than regular faucets, mainly because we they are old-fashioned. While you cannot adjust running water to whatever temperature you prefer, you can mix it in the basin which conserves water in the long run, and electricity since you end up washing your hands with cold water instead of warm.

I started looking ,and I scored at Van Dykes' Restorers of all places! I love browsing their catalog and their webpage, we bought our vintage door bell there and some of our window hardware, and their customer service, shipping and handling have always been great.


 On top of that, their "Restorers Lavatory Faucet with hot and cold cross handles" was on sale: reduced from a very reasonable $74.99 to just $67.50!
Score!
They also sell a vintage tap set with levers instead of cross handles for the same price (look here).


Only a week later the VanDykes package arrived!
 Those taps are just lovely! Surprisingly heavy and solid, and much nicer looking than the price tag would suggest.


They are a bit more substantial than the old ones. Taller and reaching more into the sink they will also work much nicer than the old ones, let alone be much more comfortable to handle.


Very sweet! I love the cross handles with their label for hot and cold. I can't wait for the husband to install them!

Tuesday, September 6, 2011

Quick little DIY fix

How's your Labor Day weekend? Did you have fun?


We sure did! Family time, splashing in the pool, watching movies - just some good ol' fashioned family time.


It was only Monday late afternoon when the DIY spirit reared its head again, after 2 days of blissful nothing, and while we were OCD enough to kick start three different projects, I'll share with you the one we actually finished!


Enter the stage: our darling vintage sink from the upstair's hall bathroom.


For now we're keeping the old faucets (my wishlist for house stuff is looooong and they didn't make the top) since, you know, they work and we have a long list of other stuff to do before wrangling with the installation of two tab faucets. What did bother me, though, were the missing "Hot" and "Cold" thingamajiggs.


[Before: Poor faucet, missing its button]


Before you start wondering, those 'inserts' that tell you whether it's the hot or the cold side are called hot and cold buttons. I kid you not. I'd expected something more .... I don't know, special plumber 'lingo, but button? Anyways, if you loose one of those you need - hold on, this is a killer - "replacement hot and cold buttons".


[Replacement buttons]


I found mine near the fittings and valves in the plumbing aisle at the orange box for some measly $4


[This is what they look like from the back ...]

I didn't like how the brushed nickle buttons looked with the chrome faucets, so I decided to go with the chrome pair instead.


Quick and easy - no tools were needed. All I needed to do was pick the right button for each side and press it over the screw in the opening. The crimp-y backside snaps over the screw and - voila! - no more gaping hole!


[After: All fixed!]


That's how I love my DIY projects: quick, easy and without causing side projects and extra work. Yes!


Sunday, August 14, 2011

Refinished Vintage sink

Even before moving in we learned we'd scored a great set of neighbors. John, our across-the-street neighbor, who is restoring his gorgeous Craftsman style bungalow all by himself, even gifted us with a vintage pedestal sink as a house warming gift. Sam, a member of our contractor's crew, manhandled the heavy cast-iron sink upstairs and Olin, our plumber, hooked it up. While it worked beautifully from day one, it definitely showed its age:

[Before: No denying this sink has seen some years ...]

While overall in pretty decent condition, our sink had seen a couple of hundred hand- and tooth-brushings and those years had taken its toll on it. There were scratches and rust and all kinds of other telltale signs of age and use. Still, a pretty cool vintage sink and well worth saving.


During a recent run to the box store I picked up one of these kits on sale for just about $30. trying those kits was definitely worth a shot, and I could hardly pick up a new sink for $30 anywhere, right?

[Step 1: Thorough cleaning]

The instructions were very simple and straightforward. First, a through cleaning and scrubbing with TSP followed by an overall scouring with fine steel wool to roughen the surface (yeah, I didn't think it needed anymore of that but did it anyways).


Much to my joy, the product comes as a spray paint. Woot! I'd gotten plenty of practice using spray paint over the past couple of months so my confidence went up a couple of notches; I could do this!
[In-progress: Surrounding areas taped off and the first coat sprayed on]

I taped off the surrounding areas with a big plastic drop cloth, wrapped up the taps, totally forgot about that thingamajig that the sink plug attaches to and went a-spraying. It went on like a dream and was such an easy feat that I included the top edge of our bathtub that showed the telltale signs of a then attached and now removed shower enclosure

[After: Like new!]

[After all of it: All nice and shiny!]

The vintage sink now looks like new, and so does the tub. This was definitely a project for the win, even if it meant that we couldn't use the sink for the three days it took the finish to fully cure. So far, the finish is holding up really well. You're not supposed to use any harsh chemicals and/or scrubbies on your refinished surface (and if you wipe it down regularly you really shouldn't need to) nor train or duel Beyblades on it, but, hey, that's easy enough!


Tuesday, April 5, 2011

Stow a-way!

It's once more back to the upstairs bathroom. You know the one that's always teetering on the border between "done" and "almost done". Yes, that one. The neat vintage pedestal sink is now installed and fortunately the existing faucets turned out to be functional and non-dripping to boot (although I -am- eyeing a scrumptious pair of double faucets on Vintage tub and bath to replace them with). That makes it a fully functional bathroom with sink, toilet and tub! Hurray! Now it's on to organizing and cleaning. Unfortunately I forgot to take a before picture of the bathroom closet. I think it's possibly visible in some of the before shots but either way, it's a deep and narrow closet tucked between tub and door. Hinge remnants hint at the former existance of a closet door which is now missing. That's okay. It'll take a while until we've decided if we want a door or just hang curtains to cover the potentially amassing bathroom clutter in that space. When I started painting the bathroom I removed the existing shelf boards. They were unbelievably filthy and beat up, not to mention featuring layers of peeling paint. For a while I was contemplating reusing them but after a trip to the local reStore this past weekend I decided to support charity, go easy on my nerves and time and picked up a couple of white MDF shelf boards. Back at the Darling Duckling I measured, taped along the cutting line to limit the amount of damage to the finish and cut the shelf boards to size. 20 minutes later the closet space looked like this:

[After: shelves and baskets]


Voila - a clsoet ready to be filled with assorted bathroom related stuff. There's even room for hooks on either side in front of the shelves for hooks to hang a bathrobe or two. One project checked off, now onto the next!
Sunday, March 20, 2011

Splish-Splash

Almost ready to take a bath ...or as we prefer it, a shower. The upstairs hallway bathroom is alternating between the stages "done" and "in-progress". It was "done" for a while, then we switched out sinks (from vanity to antique pedestal sink here].

It was "done" again for a short while, until we discovered that there was NOT.ONE.SINGLE.OUTLET in the entire bathroom. Clue: the electrician who bust a new hole into my freshly painted bathroom walls followed by spackle and paint touch-ups.

It was "done" for a little while again, until the shower rod arrived in the mail. I snatched up a great deal on a curved shower rod with liner and hooks at overstock.com for about $30 total thanks to a coupon that was burning a hole into my pocket.

[New shower rod]

Husband went to town, measured, marked, drilled and about an hour later we had a beautiful new shower rod and liner gracing our hall bathroom.

And while the curve doesn't look at all pronounced, the space gain inside the shower is MASSIVE! No more cold shower curtain sticking to you in the shower, no more elbows getting trapped in cold wet shower curtain folds.
Curved shower rod - Go, get one; you know you want one!

[Oh yeah, and of course I need to touch up the paint again where husband marked the walls ... ]

Saturday, March 5, 2011

Housewarming gifts

I know! We haven't moved in yet, but we already received our first housewarming gift from our neighbor across the street: an antique cast-iron pedestal sink!

[Before: dirty but not bad]

I'd originally planned to re-use most of the fixtures already present in the existing upstairs bathroom; they were dirty but functioning and not too old. The water closet is a Kohler, the vanity a standard blue or orange box stock vanity. Armed with paint I went to town:
  • removed gobs of old caulk and re-caulked the bath tub
  • spray painted the bath tub fixtures a nifty Oil Rubbed Bronze color
[fixtures sanded, then primed and spray painted]
  • replaced the cheap-o shower head with a rainfall shower head
  • spray painted the frame of the mirror cabinet Oil Rubbed Bronze color
  • ordered a curved shower rod with liner and hooks (we're going to re-use our existing fabric shower curtain that is pin-striped in blue, taupe, brown and white)
  • bought a replacement towel rod
  • painted the whole room in "Cloudy Day" grey
  • painted the built-in closet white
  • painted the trim and the ceiling in Behr Ultra "Pure White"
[vanity with a coat of automobile primer and orb spray paint]

I also gave the existing vanity a fresh new coat of white paint and in a moment of craziness spray painted the entire cultured marble top, faucets and all, with ORB spray paint as well. It really turned out pretty cool. Then our neighbor asked me if I had any use for this sink :o)

[Introducing: The Sink]

It's perfect! It's in great shape and really only needs a thorough cleaning, like the rest of the bathroom. It's amazing how the pedestal sink opens up the space. Luckily we have a humongous built-in closet in the room and can easily live without the storage space a vanity provides.

[Looking good there!]

Today the curved shower rod I ordered from Overstock arrived in the mail which means we're one step closer to a finished bathroom.

Maybe I should drag my steam cleaner out to the ugly Duckling tomorrow and rather than paint some more trim, spent a few hours cleaning this room to within an inch of its life... Well, I better wait until the electrician is done. I don't know how it escaped us but there is NOT. A. SINGLE. OUTLET in this bathroom. Not one. So we're adding one ...and I guess that means I'll have to touch up some paint where they bust through the wall.

Friday, February 25, 2011

Bathroom Dreams

Work is progressing steadily and the first couple of orders are delivered to their final destination: the Ugly Duckling.
The arrival of my super special clawfoot tub was delayed by two days thanks to obviously atrocious weather up north. Instead of Wednesday, it arrived, finally, on Friday (2 weeks ago)!

[Not in an envelope but Fedex-ed all the same]

[First peek - look at those curves!]


[My, are you pretty!]


There she is, waiting for the plumber to rough in the lines for the funky telephone faucet and the drain sometime this week. It was well worth the wait - it's exactly what we wanted for our master bathroom and came at a spectacular price.

One step closer to an actual bathroom!

Wednesday, February 2, 2011

A pile of tile


Thanks to a combination of early release Wednesday, homework and too much construction dust for our munchkin to hang around safely, I'm home earlier and didn't get to spend as much time at the Ugly Duckling as yesterday but that means between loads of laundry and wrestling with the vacuum cleaner I get to update you today on our progress.

[Brace yourself for some really gross
Before pictures, folks]

So, our masterplan of house domination includes converting the upstairs kitchen into a dressing area and master bathroom. With half the plumbing already in place and adjoining the largest of the three upstair's bedrooms it's just meant to be, right?

The only obstacle? A dirty ugly kitchen with blah cabinets, gunky tile and other unmentionables. It simply had to go, and go it did. Thanks to Sam's berseker-style demolition skills our upstairs kitchen went from this

Before

[Saving grace of the room: lots of light, lots of usable space, view of backyard]


to this
In Progress

Looking better already, if you ask me!
And here is the mood board for our master bathroom so you know what we're shooting for in this space

Design Plan

Sunday, December 19, 2010

And the lamb fell in love with the lion ...

... and got herself a clawfoot tub for long luxurious "up-to-your-neck-in-bubbles" soaks.
Heh ...

One of the many things I adore in our historic rental apartment that we've been living in for the past 6 years is the clawfoot tub in the only bathroom. It's charming, it's quirky and it's simply perfect for a nice bath on a cold winter afternoon. It also has a shower rig and a wrap-around shower curtain for quick showers and is as versatile as it gets. I'm loving it! I also love the original penny tile with its baby-blue border design despite its cracks and discolored grout. I don't love the original farmhouse sink with the two faucets (one for hot and the other for cold water) and it'd be awesome if we had at least another half bath but for the past couple of years it's worked as well as it could. Did I mention that I love the clawfoot tub?

The Ugly Duckling has currently 2 full baths and an upstairs kitchen. None of them, however, have a clawfoot tub ... *sigh* Our grand plans have us chopping the downstairs full bath into a half bath to create space for a laundry area in the mudroom and turning the upstairs kitchen into a fancy master bath. WITH a clawfoot tub! Not like that would surprise you after my confessions above, n'est-ce pas?

So while we continue the waiting game for the closing date and the begin of our renovations I get to design budget-busting looks on polyvore and browse idea books on Houzz for inspiration. Wanna see?


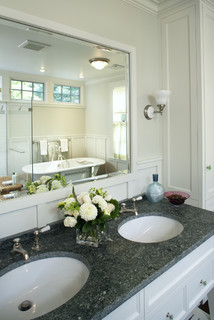
III DomA Architects, Inc. III traditional bathroom

[Alright, so that's not really a clawfoot tub. It's a free-standing tub but it's gorgeous and I love the airy traditional yet fresh look of this bathroom]


|| C O B U R N - A R C H I T E C T U R E || traditional bathroom

[There you have it, a real clawfoot tub! Fantastic!]


Renovation Redux Bath contemporary bathroom


[Here you get a sneaky peek at a clawfoot tub; again, bright and airy and crisp]


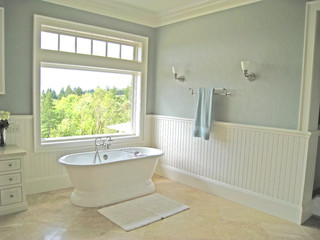
Traditional Country Master Bathroom traditional bathroom

[Look, another free-standing tub. And wainscoting. And the fresh airy brightness like in the other pictures. Notice a trend?]

I love how clawfoot tubs don't care if it's a contemporary sleek bathroom with concrete countertops or a frilly frou-frou oldfashioned salle de bain - they fit right in into any kind of setting. Husband and I mix up to a "farmhouse meets NY City loft" kind of style and I'm telling you, the tub dots off our Ts and crosses our Is.

After poking around on the net and playing with polyvore's editor here's what I came up with for a first draft. Mind you, it hasn't been run past the husband for his approval but I think it balances the feminine and the masculine with the contemporary and the historical quite nicely. What do you think?

Master bath

Master bath by Littleoldhouse


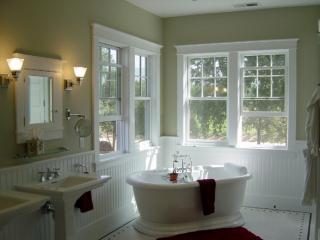
We're digging penny tile and think that using a dark charcoal, almost black penny tile (maybe with a border pattern of white penny tile along the perimeter of the room) will nicely ground all the bright white and light grey we have planned for the walls and ceiling and fixtures. We're torn on either using wallpaper or a monochromatic stencil (creating the pattern through using a glaze rather than a different color) to add a bit of visual interest so stay tuned for further development of this thought. We'd like a vanity from an old dresser with crisp ceramic vessel sinks. And of course a clawfoot tub. Maybe a corner shower. Maybe. We need to take the measurements over at the house and draw it out on the floor. Maybe even use blue tape to lay it out on the floor? Hmm ...

Oh, yes, color! We love the clean, almost austere look of this mood board and since this room gets a LOT of sunlight we'll actually be able to have a live plant or two in this room as well for a pop of color. We're still debating the matter of curtains: airy white Roman shades come to mind.