Friday, April 29, 2011

Green Thumb Dreams

Since Little Man and I will be camping out in the boonies with our cub scout pack tonight before tomorrow's big final push to get the moving done, I thought that I'd leave you with a little post about the outdoors at the Ugly Duckling to tide you over the weekend.

We'll be crashing and sleeping at our darling little old house tomorrow for the first time, testing our brand new kitchen (Note to self: Must get kiddie pool to contain husband's coffee making experiments) and sifting through and shifting boxes all weekend, that I doubt I'll find the time to properly update every day. Plus, there's the hint of a cold creeping up on me and I'm feeling slightly drained. Joy! Meh ...

From the start we had a fairly good idea of what we wanted for our back yard: a slightly tropical retreat with lots of color and cozy touches. And room for a splash pool for the Little Man and friends. Poking around on the 'net I discovered several garden planners and although none really blew me away, I did dabble with the one I found on BHG.com a little longer than with the others. Also, it's pretty colorful which always pleases a visually inclined person like myself :o)

Here's a screen shot:


[source: bhg.com]

If anybody figured out a way to adjust the working window size or 'move' around your lot without moving structures, let me know. It was giving me a hard time, my patience was wearing out slowly so I threw my hands in the air, let measurements be measurements and simply went for the look without it being 100% to scale. I mean it's just a concept sketch anyhow, right?

So here we go:

We really want to have a small deck off of the backdoor: just big enough to fit our patio set and gas grill so we're looking at a deck that's about 12ft deep and wide with a cut out to accommodate one of our two a/c compressors . Behind that is the best corner for Little Man's splash pool (It's funny: I had to use their bird bath icon to simulate the pool since their other pool icon is kidney-bean shaped).

Across from the pool via a stepping stone path from the deck is a little bench tucked between flowers and covered by a little arbor for added coziness. I'd really love an orange tree and some other tropical plants tossed together with butterfly and hummingbird plants to add to that colorful Florida feel. I mean, c'mon, we -are- in Florida - we might as well flaunt it!

We're not aiming for a grassy-green lawn. Our climate doesn't really allow for a soft grassy green expanse in your yard unless you want to go broke which we can't afford. Plus, grass capable of surviving Florida weather tends to be rather harsh and spikey. Right now I'm brushing up on alternative ground covers and so far the groundcovering thymes look very promising!

Thanks to code we had to stuff both of our ac compressors into our back yard. They are located on either side of the kitchen window leaving a 4ft opening between them - perfect for a miniature kitchen garden in a raised bed! I have my eyes on a small curly-cue iron trellis for the back of it so pole beans and/or sugar snap peas have a place to climb.

I did order a butterfly garden kit and a few other plants from Michigan Bulb Co. Mind you, this company gets a bag of badly mixed reviews which I discovered after I ordered so right now I'm basically assuming the worst so that I might end up pleasantly surprised. According to the reviews you either hit jackpot or rock-bottom so wish me luck! Thanks to a rather generous coupon this won't be a too expensive lesson to learn ...


Thursday, April 28, 2011

The fireplace that will be

A big imposing fireplace was definitely not the selling point of our Ugly Duckling. Sure, it does have a fireplace, sort of. At some point in its history, the owners decided that a fireplace wasn't a must-have, ripped out the cast-iron insert and bricked the entire thing up.

While we didn't want to add a gas fireplace or try and find out what it would take to restore the existing set-up into a wood-burning fireplace (Remember my worries about wooden houses and fire/gas inside?), we still thought it needed -something-. Something that would turn it from a humongous brick wall in our livingroom into a design feature or sensible focal point (since it's already drawing a whole lot of attention to it through its sheer size)

Our first test to see how adaptable it was, was painting the brick matte white (you can read about that here). It had already been painted over with a satin brick red paint so we didn't feel bad about painting the old brick (removing paint from brick is a real bear and usually damages the brick). The matte white did do wonders for its overall appearance. It turned into quite a looker!
[After: Hello pretty!]

I'm sure you noticed the square in the center that we spared. It is right where the firebox would have been had it not been bricked over. You could actually very easily tell old brick from new brick: the new bricks had a crisp sharp edge and a less porous surface than the older, original brick.

Like Carter excavating Tutankhamen, we managed to wheedle the first brick out of its spot after several hours worth of chiseling, drilling, hammering and hacking.

Frankly, this is something we should have done the day after closing. It's a godawful mess (Yes, our contractors warned us) and 'stinking filthy' doesn't adequately describe your looks after handling a brick or two.

[A first peek]

Unfortunately, we can't continue to quote Carter. We didn't get to see "some marvellous objects here" but more bricks and bricks all covered in a layer of thick fatty soot. Joy!

[In Progress]

Husband continued to hack, chisel, chop, drill and sledgehammer away. Both he and the Little Man looked like they'd been working in the coal mines all day after they were done.

We cut a piece of plywood to size and scribbled a quick note on it, both for us and for possible future owners, and after signing it wedged it into place to keep drafts out. We'll seal it with some foam and then add the last ingredient to a successful super-inexpensive fireplace make-over.

Wednesday, April 27, 2011

Please help our Historic District

[SOS: Save Our Springfield]


Ever since Springfield was added to the National Register of Historic Districts in 1987, our neighborhood has lost an estimated 450 structures through demolition. 450 historic structures that no money in this world can ever bring back. Sometimes an old structure is too far gone to save but most often the cause is greed and wanton neglect leading to the destruction of the historic fabric of this neighborhood.

Demolition should be the very last resort, not the standard solution. Too often a house is doomed to demolition because the owner/investor neglected to properly secure the structure or , in growing numbers, orchestrated the demise of a house in order to force the city's hand to demolition.

Case in point: 1325 N Laura St.
When its current owner bought it in 2006, it was a perfectly livable historic home. The buyer requested its demolition in order to build a new house on the property and was denied. In the following years he stripped it to its bare bones: siding, windows, flooring and even the chimney are all gone, the house an empty shell left to the mercy of the elements. The fact that it's still standing is evidence of how well it was once built. This house is now on the table for demolition which is what the owner wanted in the first place.

There are no safeguards in place that keep an owner/investor like that from forcing the city's hand destroying the historic heritage of our city. This has got to stop!


If you have a moment, please consider signing our petition


Thank you!

I like to move it, move it

I like to move it, move it
We like to move it!

Last Saturday we kicked off the Big Move with "U-Haul Day". We'd rented a truck and had planned to move as much of the software aka anything smaller than a book shelf and lighter than a washing machine we wouldn't need for the remainder of our time over at our rental apartment.


We started early in the morning. No, really! No joke - we were up, dressed and fed by 8am and ready to load with the truck in front of the house just 30 minutes later thanks to living so conveniently to the nearest pick-up station downtown.


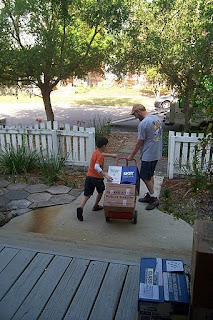
Box after box went down the stairs, onto the dolly and into the truck. Husband commented at some point that the truck started to look like a liquor store on the move (or on the run). Vodka, Rum, Whiskey - you name it, we got it!


It also turned out that our worry that Little Man would be in the way more often than not, was completely unfounded. He enjoyed the adventure so much he kept pulling his weight all day long and collapsed in the evening just like his parents.
After a while our respectable pre-packed pile started to shrink and we got to see the French Doors leading to our front porch again! Light! There is a light at the end of the ... behind the stacked boxes!


After 4 hours of steady loading and only one (!) brief set back when one of the boxes gave up and barfed up books all over our stoop, we were on our way over to the Duckling to repeat the process, just in reverse


And here is part of our load after arriving safely at its new destination. Over the next couple of days we'll be dropping off smaller loads using our own car as we downsize our household over at the rental bit by bit and on Saturday we have a truck and 3 movers to help us move the big ticket items.


And then we're officially arrived at our new old home! And I will collapse as soon as the door closes behind the last box. Promised!

Tuesday, April 26, 2011

All batty

Remember the faux batten and board treatment for our Master Bedroom? I think the last time I showed you an update it looked like this

[In Progress - and yes, the patchy cow-print trim is driving me batty]

Since the trim isn't painted yet and I can't with good conscience expose you to more patchy trim here's a current shot from the opposite corner. Every seam is caulked, the boards are painted with semi-gloss Ultra White and I even got around to painting the base molding to match. Yay me!

[After]

I'm so in love with how it looks, I'm itching to add it to another room. Muhahaha ... and since I'm the one who works part-time, there's very little husband can do to stop me, right?

Monday, April 25, 2011

Show me ... The hole in the wall!

You would think that after scraping, patching, priming and painting foot after foot of trim I'd be more than just sick and tired of trim.

How is that a certain piece of trim gets me all giddy with excitement? Let me show you!


[All chunky goodness!]


8 (!) pieces put together create the trim you see in this close up. No, it's not primed or painted yet but since it's brandnew I won't have to scrape and patch it. Thank God for small blessings. And it's oh so pretty!

Look!

Ta-da! Yes, ladies and gentlemen, this is the arch way to our living room aka "the hole in the wall". Now it's an Arch Way with a beautifully chunky presence just the way it's supposed to be.


[Before/ in-progress]

Much much better, don't you agree?

Sunday, April 24, 2011

It's a (newel) post!

You know sometimes you might think I'm a little biased when it comes to our contractor team but the truth is we know just how lucky we are to have found them and feel truly blessed to have them by our side. They have our backs, they help us maneuver the paper war of a 203k loan and their advice has proven invaluable. Alright, so I'm biased but that doesn't mean I'm not right :o)

Truth be told, I'd tackle another rehab tomorrow if I knew they are on board.

Anyways, one of the cool things Gloria will do ever since she got her iphone is email me little teaser photos she snaps at the shop or over at the Ugly Duckling while I'm at work. That way I got to see in-progress shots of our wrought iron window grilles and then this week I got a sneak peek of thisIt's a newel post! While we're not yet restoring the original stair case, spindles and all, a newel post was definitely on our wish list to cover up the chunk missing from the second step that showed where there had once been a newel post until it was removed, probably around the first time the Ugly Duckling was turned into a Duplex (Sins of the fathers, I'm telling you).

It'll also work as a constant reminder that we want to remove that not so original half wall and reveal the beauty of the open stair case and original trim we know is hiding behind this bit of dry wall.


Here it is from another angle. I love how chunky and massive it is. It fit into the opening like a glove - fantastic!
See the first step at the bottom? The one with the chopped off edge to the left? Yet another scar from the Duplex Times where the graceful curve of the bullnose fell victim to the drywall construction. Bah! Luckily, the same woodworker who managed to build the newel post that fit its spot to the very millimeter is also going to make that one pretty again. Wheeee! (And yes, that'd be Joe. Oh, and Phil is the one who trimmed out everything so beautifully)


And this is now the view from the living room :o) With the door open, obviously.

Saturday, April 23, 2011

Before & After : The entry hall

From a tiny blah bedroom

Before


over the first steps
into the right direction

In Progress


To an - almost finished - bright
and airy entry hall

After

[Just pretend the trash bad and other
bits and bops of gear aren't there, okay?]

Who'd have thought that re-opening two walls would have such an impressive effect? This area look three times bigger than when it was relegated to a narrow and cramped bedroom. A-ma-zing!

Things left to do: paint trim (Ha! Wouldn't have guessed that, would you?), add window treatments, install new door lock and handle and update questionable lighting.

Friday, April 22, 2011

Must-do List

Here's our immediate to-do list for the Ugly Duckling so we can finalize our transition from rental into our own house. I get tired and achey just reading it - argh! So many projects, so little time!

Oh, well, no rest for the wicked

  1. finish painting stairs [in-progress: one half is painted]

  2. finish painting hallway [Done!]

  3. finish painting living room [Done!]

  4. finish painting Master bedroom

  5. open up fireplace [Done!]

  6. install locks [In-progress]

  7. install stair handrail [In-progress]

  8. patch around new outlet in hall bathroom [Done!]

  9. touch up paint in hall bathroom [Done!]

  10. touch up paint in kitchen [Done!]

  11. paint downstairs' half bath [Done!]

  12. scrub downstairs' half bath

  13. apply last coat of Waterlox on kitchen counters [Done!]

  14. wipe down kitchen [Done!]

  15. install cabinet knobs [Scary project. I mean, it requires drilling holes into my pretty pretty cabinet doors! Ack! Knobs and tools are in place, now we just need to find the courage to do it]

  16. lay floor in laundry room [In-progress: Flooring is ordered and scheduled to arrive next Wednesday]

  17. paint laundry room [Done!]

  18. install wall cabinets in laundry room

  19. install shelves in the hall closet

  20. sand and paint floor in dressing room

  21. build and install shelving in dressing room

  22. paint dressing room

  23. scrape old paint off of trim all over the house

After that the fun continues with the painting gobs of trim all over the house, laying first cement board and then tile in the Master bathroom and finally installing all bathroom fixtures in the Master bathroom as well. Once that's out of the way we can then turn our attention to the outside of our darling house: the fence, re-caulking windows, painting and landscaping.

Wheeeeee!
Thud -

Thursday, April 21, 2011

Too many choices

One of the first things you learn after you bought your house is that there are plenty of reasons and occasions to go shopping for your new/old house. More than plenty. Fixtures, faucets, window treatments, paint colors, door knobs, closet knobs, stains and finishes - the list is practically endless.That is a lot of fun but like with many things, after a while it does tend to wear you out a bit.

At this point I'm sated, saturated and satisfied where my desire to go shopping is concerned. Now, don't get me wrong. There are still lots of pretty pretty things I want for our house but I don't want to go 'shopping'. I want them to magically appear. Yep, just like that.

This past weekend we nailed down our flooring choice for the laundry room and also managed to amend our tile selection for the master bathroom (more on that later). That leaves us still undecided on the matter of the flooring for the dressing room for our Master Bedroom. And frankly, I'm beyond looking at flooring options right now.
Bleah.

So ... in a stroke of genius (or maybe it was the fumes from the Waterlox) we decided to just paint the plywood subflooring. Add a stencil. Seal. Done. Finito.

Like here

hall way floor at wobblyblog
boys' room floor at My 3 Monsters
kitchen floor at Back to Domestics

It's too big of a decision and we don't want to make it -now-. It will affect the entire upstairs and that's something that shouldn't be done lightly and spur-of-the-moment. Right?
Right.

So I've been poking around on the 'net for a nice floor stencil. Something that goes beyond taping down a border with frog tape, maybe. In case I feel like shopping for a stencil. Here're my favorites from Stencilease

[source: stencilease.com]

I kind of like the first one; it reminds me of vintage tin tiles. I also plan on checking out places like Hobby Lobby and Michaels for their stencil selection once I'm over in that corner of town. That reminds me I need to swing by World Market for window treatments.

Ugh ...shopping!

Wednesday, April 20, 2011

Packing up

About time, eh?

With the (major) work slowly but surely coming to an end at the Ugly Duckling, we're ramping up the preparations for our impending doom ....err, move.

Good thing we're newspaper people; our newspaper subscription saved us from having to find a source for wrapping and cushioning material simply by saving the daily paper after we were done reading it. We don't need no stinkin' bubble wrap! We got paper like there's no tomorrow!

Having moved our extensive personal library once (we're just a leeettle bit over 1500 books ... all scanned, cataloged and Dewey-Decimal-ed into our book shelves) we know the value of sturdy, not too large cardboard boxes. Your best source for those is the liquor store around the corner. Shakespeare and cohorts will be traveling the 6 city blocks to our new home safely packed into Vodka and Whiskey boxes. Oh, and we tag our boxes, of course, to make sure where they belong.

There's no real method to the madness when it comes to moving for us. We've been sorting and de-cluttering for the past couple of weeks to make sure we don't move too much unwanted crap that's accumulated over the past 6 years of living in our historic rental but we're nothing but laid back and so there's still plenty left to pack.

This coming weekend we'll be U-hauling a lot of the software aka 'stuff' over to our new digs followed by a brief stint of an actual moving company dealing with the heavy hardware aka heavy furniture and appliances a few days later.

And then we will finally get to deal with those funny "First Night Jitters", just like Brandt and Ashley over at "New House on the Blog"

Tuesday, April 19, 2011

Brief Intermission

Look what's blooming in our yard!

[Loquat tree at the Ugly Duckling]

This is a Loquat also called Japanese (or Chinese) Plum. It is indeed edible and tastes like a cross between a cherry and an apple. According to our lovely neighbor, Mrs Harriet, it is delicious in pies and as jam. We'll have to try that.

Good thing I didn't have time to move these odd trees. I had dubbed them "Dr Seuss trees" solely based on their looks, not knowing what they were: they have spindly thin branches with poofs of leaves at the end. Kind of like this, you know ...

[Dr Seuss' Truffula trees from "The Lorax"]

All in all there are 5 of them, four in the front and one more in the back (in the most awful and awkward place you could plant a tree). I'm tickled to find such an exotic fruit tree growing in our yard so even though they are of the same awkward beauty as a long-limbed teenager they'll get to stay.

Anybody got a good recipe calling for loquats?

[Update: I think I might try some from this webpage ...]

Monday, April 18, 2011

Finishing off the butcher (block)

I loooove my butcher block countertops! They are chunky, smooth and I love how their warm color adds to the coziness of our kitchen. Of course, I also love that they came at a steal as part of our IKEA kitchen order. The only drawback? Finding the answer to that old question of "How to finish them". After all, you don't want to ruin them the first time you start cooking up a storm in your brand new kitchen. The first and most important question you will have to find an answer for is
"Do you want to cut on your counter tops or not?"
If your answer is "Yes!", all you really need to do is get yourself a bottle of mineral oil or tung oil , oil your counter tops and start cooking. You'll end up using lemon juice and salt to remove stains and sand and re-apply more oil on a regular basis. Sounds awful but it's really not that bad. A friend of mine showed me the butcher block next to her stove that she uses to cut and prep food on and she even uses bleach to wipe it down and it still looked lovely.
[Before: Part of our butcher block counter tops - pretty but matte]
Anyways, husband and I just couldn't shake off that "No cutting on counter tops!" upbringing we both had experienced and since our contractor team had created cutting boards from left over pieces there's also no need to do so. We decided we would like to beef up the protection of our beautiful butcher block counter tops instead, especially around the sink. After much research online and after a lengthy conversation with the staff at our local WoodCraft store, we bought a quart of "Waterlox". Waterlox is your basic tung oil with some resin added for extra "oomph" when it comes to locking out water and stains.
[The cast: foam brushes, waterlox and fine steel wool for a last sanding]
You can download the instructions on how to apply Waterlox from their web site but it's really fairly straightforward and simply. Nevermind, I was a bit anxious. I mean, what if I ruined them? That'd be awful! After husband left for work, I decided it was time for the big girl pants again. I taped off the edges of our farmhouse sink and then popped the lid of the container of Waterlox.
[Close-up: Waterlox]
After giving the counter tops a last fine sanding with steel wool, I poured some Waterlox into a dish. Waterlox cures by oxidization so you're not supposed to leave the can open or pour any unused remains back into the original container. I think I expected Waterlox to be more like polyurethane, thick and oily, but it is surprisingly soupy and more like a very strong tea.
[In-Progress: First coat]
One deep breath - and since I went with the VOC compliant version, the smell wasn't too bad - and down went the first coat. Oh boy! It's NICE! Applying Waterlox is really simple. I used a foam brush because they are cheap and rather than dealing with cleaning paint brushes using the method described in the instructions I could just chuck them. Yes, I know, that's not very green of me, but it's probably as green as washing a paint brush in copious amounts of paint thinner having to wear and toss protective gloves.

[In-progress: Here you can see how the Waterlox brings out the woodtones - left/unfinished vs right/finished]

[After: First coat applied]
Applying the first coat went quick. The wood greedily soaked up the finish/sealer and we're well on our way to glossy rich butcher block counter tops. Each successive coat will help fill up all of those pores and create a satin gloss finish on the top that will keep the beauty of the rich golden oak counter tops preserved. I hope I'll be able to add the next coat tomorrow afternoon. I want to give the finish as much time to cure as possible before having to actually use the kitchen.

Sunday, April 17, 2011

Riser Transformation: Part I

And we're back!

The polyurethane on our floors has dried to a beautiful semi-glossy finish and cured enough to allow us access to the house again. We're ecstatic even though that means we're back to scraping and painting trim and trim-like areas. Case in point: the stairs. Now that the treads are refinished and pretty, the risers appears even uglier than before. They are painted with the same brick-red paint like the fireplace (which we painted a crisp clean white here). Today I managed to take care of the first 2 steps in the lengthy process of bringing our risers up to par with our pretty glossy yummy chocolate-brown treads.

The prep work really takes the longest. Our little house has lived a long life already with very little love and it shows, especially in the flaking paint, bumps and bruises of bad rushed careless paint jobs. While we're no professionals and really no perfectionists either, we're trying to do better than that. The Ugly Duckling definitely deserves it. She is such a good house!

First we scrubbed the risers and base molding on either side. Remember - you can't paint over dirt, really. After giving the stairs some time to dry, I carefully taped off the treads using my all-time favorite: green frog tape. There's nothing better out there, really.

[Before: Taped and ready to go]

Next thing: primer! It always feels like you are laying on a very crappy coat of white paint. I mean look at it! All splotchy and uneven. Oh well. It's got to get worse before it can get better.

[In-Progress: All primed]

Primer makes things look worse. Every bump, every chink, every crack stands out. It's awful, really, but pretty helpful when you're trying to patch things. So that'll be the next step - patching the old scars with wood filler, then sanding and priming them again before the final step of giving them a clean crisp coat of white semi-gloss paint. Yum!

Saturday, April 16, 2011

World's smallest powder room

"A Bathroom so teeny, so tiny,
with just enough room for your hiney"


That'd be our downstairs powder room for you. Well, okay, it's not -that- tiny but it is fairly small and frankly, it's impossible to take pictures of it. I might have to put a ladder in front of the bathroom window and scale it to take better pictures of it.

Breaking through the downstairs walls to open up livingroom and staircase and all the other demolition there was slowly a reluctance to break more stuff building up in me. yes, we could have ripped the existing door out and moved it a foot down the wall but no. Enough dust and debris. Our budget was also grateful that we didn't insist on this change.

This kicked off the quest for a small corner sink which I found at Vintage Tub & Bath along with a beautiful vintage-looking faucet. Here it is finally installed

[World's smallest sink]

[Pretty faucet]


[Happy together]

I'm not too crazy about the exposed plumbing underneath the sink so I'm pondering options on how to make it less obvious. I'm sure I can come up with something. Other than that it really is the cutest sink EVER!

Right around the corner is the toilet centered on the wall opposite the window. The window is fantastic since it lets in a great amount of light which really brightens the room. Removing the big honking cabinet above the toilet opened up a huge amount of space and now nobody will have to worry about ending up dead, buried underneath a heavy cabinet, with their pants down.

So what are our plans for this downstairs powder room for now? Nothing outrageous for the time being - since it features the same beige-y speckled tile like the upstairs bathroom we are going to paint the walls "Cloudy Morning" as well. This very light, cool blue-grey works so well with the tile and will tie in with our downstairs color scheme just fine. No need to play paint roulette again. We need a mirror and are thinking about installing a glass shelf above the toilet. Some art, fresh towels and a basket full of toilet tissue and we're all set.

More on that later once we enter the decorating stage for real.

Friday, April 15, 2011

Tour de knobs part I

One of the intriguing and charming details about our Ugly Duckling of a house is the quirky fact that not many of our door knobs actually match. There is even one door that has a different knob for each side! It appears that downstairs has the most original aka historically correct door knobs and most of them have not been painted over. Upstairs it's a totally different story. The vast array of styles and the many layers of paint tell an entirely different story. Brass, oxidized to a beautiful aged patina, would have been the metal of choice but it's hard to tell now. Removing the layers of paint leaves a pretty ginged up finish and so I decided to spray paint the existing fixtures with oil rubbed bronze spray paint. It really looks nice and you can see how it worked out on the door knobs in the guest bedroom here
Here's a first quick look-around at the knobs upstairs

This last knob with its beautiful filigree pattern is actually really surprising. I found the exact same one on the webpage of a store in Chicago that specializes in architectural salvage and it was dated to about 1885 - 30 years before our Ugly Duckling was built.


Oh, the stories this house could tell! If only it could talk ...

Thursday, April 14, 2011

There's an octopus in my wall!!

While we're waiting for the floors to dry I decided to poke through my many picture files to see if I could dig up something post-worthy. That's when I discovered I'd never really written about what was going on electricity-wise at the ugly Duckling. Regarding the timeline this was probably the most drawn out process. Since the Ugly Duckling had been vacant for so long, we had to have a safety inspection first before the electricity could be turned back on. That required that our electrician came in and made sure all outlets were covered and no bare light bulb anywhere to be seen (which explains for our ecclectic collection of inexpensive boob light fixtures and globes). The two main electricity projects were a) bringing our house from 2 meters (for a duplex) to 1 meter (for a single-family-home) and b) flipping the main electric panel around so it faced the laundry room instead of into the kitchen. Then everything had to be checked for safety, rewired if necessary and outlets added (outside, bathroom, etc). We also removed the last bits of knob and tube wiring we discovered.
For a while our upstairs sub-panel looked like this

[Say "Hello" to Cthulhu]


No, really, it did!


[In-progress: Crazy wire stuff going on]

Maybe it's not green and it wasn't slimy but it sure did look like there was an elder demon or at least a confused octopus hiding in our wall.
[In-progress: the octopus is now contained in a sub-panel]


After a while things started to normalize and look more like what you'd expect to find in a house. The drywall has been repaired and all that's left to do is to knock out some knock-down texture to match the rest of the wall and to paint it.

Wednesday, April 13, 2011

Standing outside

This is what it looks like when you're standing outside peeking through the window into the entryhall (antechamber, vestibule) :

[Floor refinishing in progress]


Currently we're polyurethane-d out of our house and from our projects. It really puts a cramp into your style when downstairs hall, stairs and upstairs hall are off limits. So, here we are, pressing our noses flat against the window like a kid in front of the candy store.


[Peeking through the door]


The stain took surprisingly long to dry this time but finally, after waiting an entire weekend, the first coat of poly was applied on Monday. With a little bit of luck, we should be able to go back to painting and finishing up a few projects by the end of the week. Good thing because we're starting to show signs of cold turkey like a good ol' junky.


Tuesday, April 12, 2011

Hitting the nail on the head

I want a house that has got over all its troubles. I don't want to spend the rest of my life bringing up a young and inexperienced house.
- Jerome K. Jerome

Right now we're poly-ed out of most of our house. The remaining wood floors at the Darling Duckling have been stained and today the first coat of polyurethane went on - that means the downstairs hallway and library and stairs and upstairs hall are off limits right now. More time for packing up stuff, I guess, even though we fell funny after not swinging a paint brush for several days now.

If you could see the stack of boxes that is our current library you would have no doubt that we are avid readers. All three of us. 40-something liquor store boxes are pretty much a dead give-away. No, really. Good thing we have a great public library system here in Jacksonville - that way we don't run out of reading material what with all of our books packed up. One of the books I picked up and enjoyed greatly was/is

Renovating old houses - bringing new life to vintage homes
George Nash
The Taunton Press
ISBN 1-56158-535-1

It is jam-packed with great information and DIY advice including instructions on how to repair old windows, terminology and and and. And best of all, it comes with a number of really neat old house quotes and an introduction that I feel best manages to capture why we feel about old houses the way we do and what makes people come together and fight for their preservation like "SOS Preservation".

Excerpt from "Renovating old houses - bringing new life to vintage homes" by George Nash

"People who work with and live in old houses use fuzzy words like feel, aura and essence to justify their obsession. These are aesthetic categories that attempt to describe the perception of beauty, the way so many old houses almost seem to live a life of their own, breathing in slow, subtle rhythms of shifting lines and weathering wood.
As do all living things, a house achieves a delicate equilibrium, a precariously maintained and constantly changing relationship to time, the seasons and its people. It responds to the care (or neglect) given it - growing, changing, adding windows and doors, sprouting porches and sheds as the years progress.
And when its people depart, a house begins to die. The process occurs with a grace, beauty and terrible simplicity. The tilt and sag of the walls, the weathered shades of clapboard and peeling paint, the tired angles of the roof, all give mute expression to the ebb and flow of the lives once harbored within..."