Showing posts with label pocket doors. Show all posts

Monday, March 26, 2012

Two sides to each story pocket door

This past week - amidst spring break fun and frolic - I got down and dirty on some more touching up action needed here at the Little Old House. You see, there is this list (described here) and when it says, for example "dining room pocket doors" it means just that: the pocket doors in the dining room.


As in, the dining room -side- of the pocket doors.


Yep, you got it.


Our pocket doors were finished only in as much as the dining room side of things was concerned.


It's all in the spirit of breaking down projects into nice bite-sized chunks.


Really!

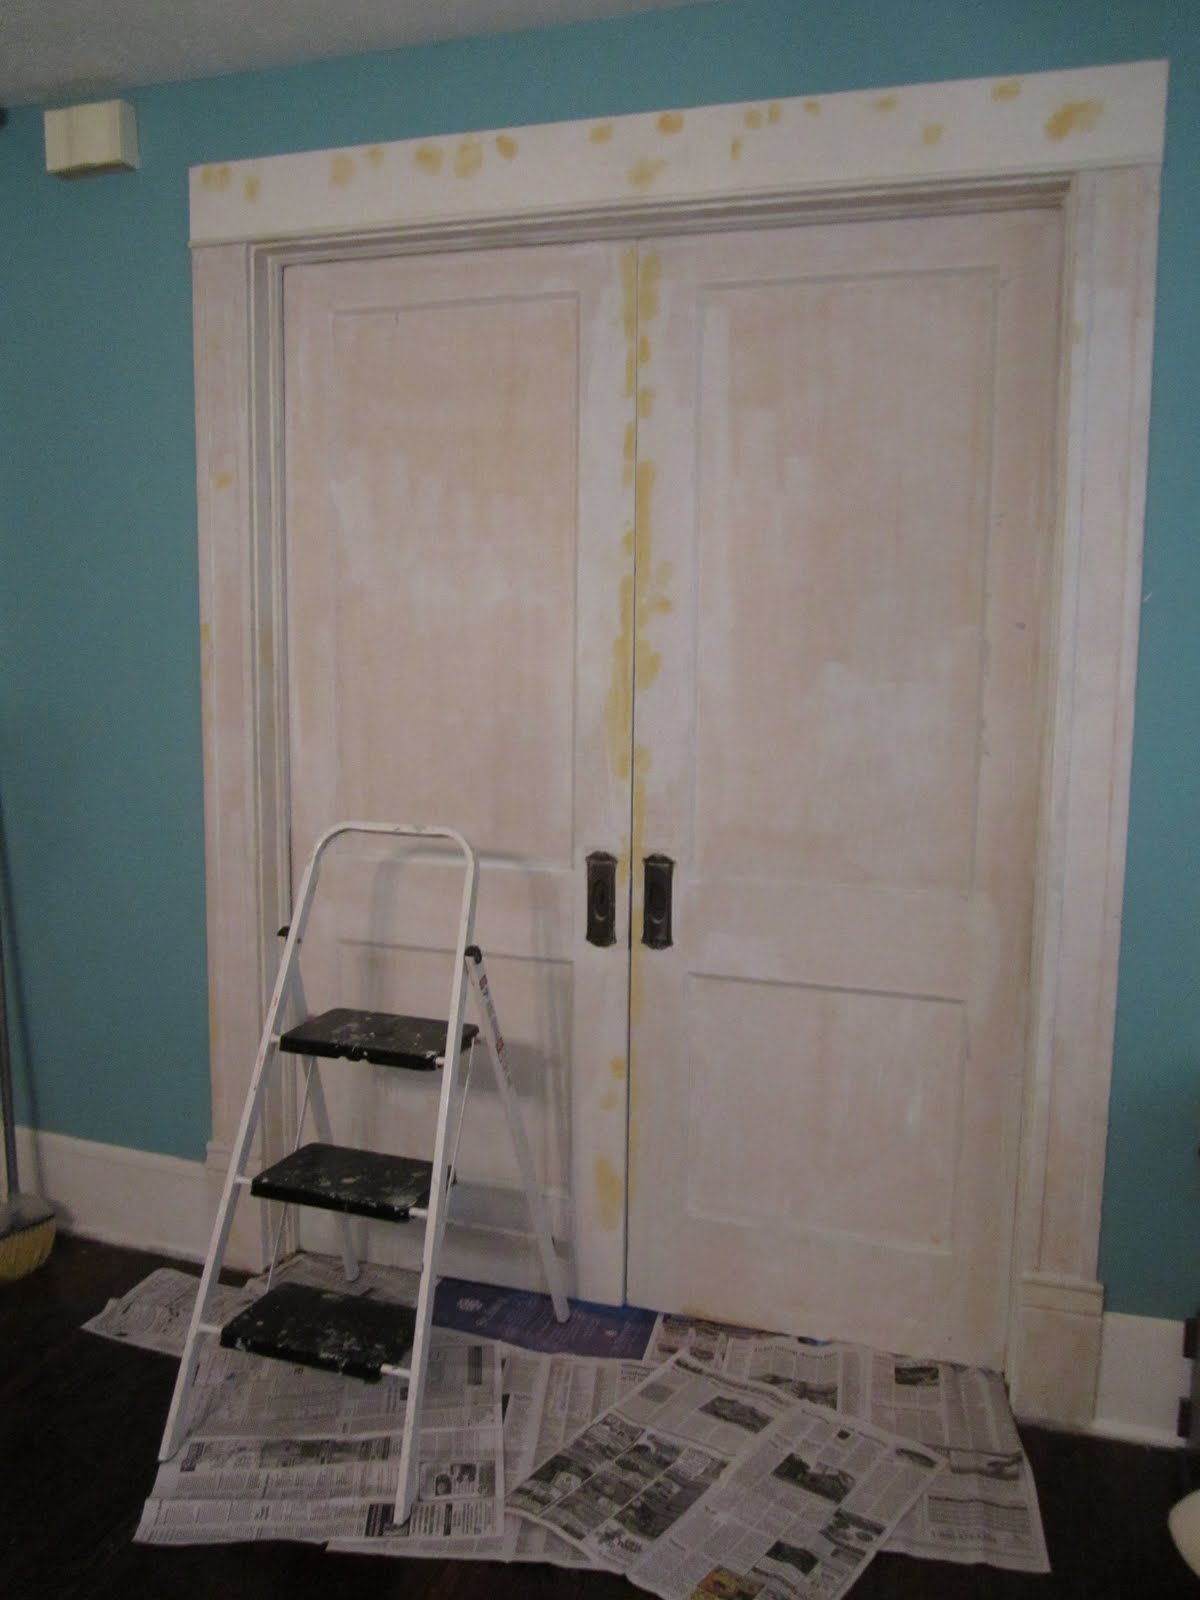
Anyways, after getting lots and lots of practice painting the pocket doors on the dining room side, I'm making really nice progress with painting them on the livingroom side. Here they are in all of their patched and primed glory. The husband thinks I should paint something on them - a pattern or the like - but I'm not sure yet. Our living room has a slight Restoration Hardware look to it with the industrial dark grey on the walls, the white accents and the vintage brass touches, that I'm not sure it wouldn't be too frilly.

I -do-, however, want to add a few more white or at least bright accents to freshen up the moody look for spring and summer. Pillows come to mind and I'm currejtly fiddling with a knock-off version of a pillow I spied at Target the other day so stay tuned :o)

Tuesday, March 13, 2012

Pi-pa-pocket doors: The reveal

It's been a busy couple of weeks with life throwing a bunch of curve balls at us, not to mention the set back due to paint fail I described over here, but finally, after lots and lots of prep work (described here and here), the deed is done and the pocket doors are agleam with a fresh coat of paint and clean hardware.

Shiny! Like a new penny!

I cleaned the original hardware from old paint splatters and gave them a quick rub'n buff with a drop of olive oil to liven up that gorgeous old brass patina. They look almost like oil-rubbed bronze but instead of the reddish glint of bronze you see the warm golden glow of old brass shining through the aged patina.


For the moment we are very careful when opening and closing them until the paint has had sufficient time to cure and harden. Most of them time, we keep them open to aide the traffic flow between our main living areas, and only close them when it's cold or when Little Man wants to watch TV while the grown-ups are talking next door.

Monday, February 20, 2012

Paint Fail

You'd think after a year of painting trim I'd have it all figured out.

Gotten to the bottom of it.

Have it down to an art.

You'd think that after all the prep work, the many days of scraping, sanding, de-glossing and priming, a paint job could hardly fail.

And yet ...

A bubble ... a stinking bubble with two thin coats of nice even latex paint peeling off like a bad sun-burn.

That loud bang you heard was my head connecting with the desk ... I've been hiding my failure inside the walls these past ...uh, weeks, frustrated beyond belief and grumpy. Yesterday I decided to just get over it and get'er done (but didn't get much further than some sanding, de-glossing and priming the stupid spot of fail).


Addendum: I did rake my finger nails over the entire expanse of the pocket doors and fortunately, this was indeed the only spot the primer and prep failed. Phew ...

Friday, January 13, 2012

Pi-Pa-Pocket doors - Part II

And it's back to the pocket doors (Although the yard is calling my name. Loudly. And the weather is gorgeous!)!

As excited I am about having them, I'm just not that excited about having to paint them. I know it'll be so worth it but after painting so much trim and so many doors already, it's one of those projects that I'm having a hard time finding the excitement for. Oh woe is me! *imagine dramatic hand to forehead pose*

Anyways, my pretty babies are now patched, caulked, sanded and primed and ready for some fresh paint. Here is a in-progress shot that shows the yellow patches of wood filler where I smoothed over dings and scratches on my second time around.


I then decided to venture on another detour before painting the doors and love a little on the original hardware. I globbed on some paint remover to get rid of some old paint built-up along the edges of the hardware, waited and scraped off the gluey mess.

As always, the first layer of yellowed off-white paint doesn't budge at all. That was quality paint, back then, I'm telling you. None of that wimpy Latex they are selling these days. After cleaning up the hardware I tried to prime around it. Yeah, well, that didn't work so great. There was just no good way of doing a good job painting around the hardware so after a few moments spent grumbling, I checked the screws, grabbed the right kind of screw driver and send a prayer to Heaven.


The escutcheons came off without a hitch!


I don't know what I expected to find underneath but I sure did not expect to see raw wood once I removed the hardware. And if the smell isn't fooling me, it's pine wood to boot. A quick sanding and after almost a 100 years, this spot received its first coat of primer ever.


Hier is a closer look at the original hardware from our pocket door. It's so pretty!


On the back you can see how shiny the brass once was. Over the years it has developed a beautiful patina.


Eventually, I did get around to start laying on a fresh coat of paint. Here are the first few shots that show the first coat going up on the dining room side. Of course, I'm still not finished. Tonight I hope to finish coat no. 1 in its entirty and adding coat no. 2 over the weekend. There's a German saying that basically says that "good things take their while" so yes, this is taking a while but it's looking good.


Did you paint anything lately? [<- See that? That's a trick questions :o) ]


Tuesday, January 10, 2012

Pi-pa-pocket doors - Part I

When we bought our Ugly Duckling of a House a year ago we didn't know that the original pocket doors between living and dining room were still in place, hidden behind an ungodly amount of caulk. It was like a belated Christmas present for us when we discovered them (you can read more about that here) soon after we started tearing into/out the non-original walls in the former entry and living room areas to restore the original floor plan.

After freeing them from their hidey-hole inside the walls, we continue to marvel at and love this original feature. For the most part they stay almost completely open with just a bit of door and hardware showing (this is how we love it best) but with colder weather moving in, they will allow us to create smaller, more intimate pockets inside the house to stay warm more easily in cozy rooms. Bigger isn't always better, y'know.


Here's what they looked like after I managed to pry out the left half. Gee, that was way back when the brick fireplace was still all bricked up and brick red. Oh, and the living room was painted that lovely shade of "swine" (which looked all the more pink thanks to the big red brick structure).

Shortly after that we created a big mess busting open the fireplace for a simple gel fireplace insert, painting the brick white (there's really no good way to remove paint from brick so we went with it and just changed the color) and the walls a beautiful warm dark grey a la Restoration Hardware.


A few days before Thanksgiving the husband decided that we should tackle the pocket doors. And again, life confirmed what we'd learned throughout the past couple of months: everything will take longer than on HGTV.


We scraped old flaky paint for the better of two days. In the end we decided that they wouldn't get finished in time for Turkey Day, I gave them a quick coat of primer so they'd at least be a uniform color and called it a day.

Fast forward 1 1/2 months ( I know, shame on me, but hey! Time flies! Especially over the holidays) :


Like a criminal I returned to the scene of my crime:


One fascinating aspect of primer is that it will point out to you the spots you missed during your first patching and sanding session. So rather than finally getting to paint the pocket doors I spied so many new old dings and scratches that I gave up, gave in and broke out the wood filler again.

It never ends.


Happy - for now - with my patching I then went for the caulk gun. You see, old trim is never just a one-piece deal. More often than not trim is an elaborate affair consisting of several simple pieces that together build up to a more complex piece. After scraping all that old paint and removing some of the old caulking with it, the seams between those individual pieces needed some patching as well.


Fortunately, I actually enjoy caulking :o)


Today, the pocket doors should finally be ready for their fresh coat of paint, and with a little luck I should be able to present them -all done and pretty - to you tomorrow. That is if my DIY ADHD doesn't kick in again and I get sidetracked, y' know ...


Sunday, February 6, 2011

Mystery solved!

Matt and Heather aka "The Perrys on Perry", nailed it on the head - hidden away under layers of paint and caulked into the wall for safekeeping we discovered the original set of pocket doors between our living and dining room! Christmas in February! Not too many original features survived the Ugly Duckling's long history as rental property so this discovery has us all giddy and excited!

A narrow piece of wood covered the opening at the top. It came out quickly tapping it lightly with a hammer. Original tracks are still in there. So was a lot of dust and a few smaller chunks of plaster.

Here's the hubby chipping away at half-inch think caulk and layers of paint. I took it from there - the sweet advantage of only working part-time, heh. And after 2 more hours (and many many decades) I managed to wrangle the left door out of its pocket.

Unlike the rest of the trim work in the Ugly Duckling, the pocket doors aren't covered in layer upon layer of paint which makes us believe they were retired fairly early on in the history of the house. Thank God, because I doubt the doors and their original hardware would have survived in place and unpainted for that long.

Close up of the beautiful hardware

So, now our livingroom looks like this


Pardon the dust, we have a teeny bit of construction going on at the moment and I didn't get around to mopping the floors ... yet :) The current weather isn't helping at all - gloomy skies make for gloomy pictures.

To the right you can see where we re-opened the now archway, future french doors to the entry hall. On the left is our humongous bricked in fireplace (we have plans for that), straight ahead you can see a pocket door peeking out from its pocket (it's still a little shy and doesn't want to come out all the way but who can blame it? I'd be shy if I'd been caulked into a wall for decades) and beyond that the dining room (filled with old kitchen cabinets). You even get a glimpse of the breezeway to the kitchen in the farthest right corner of the dining room.