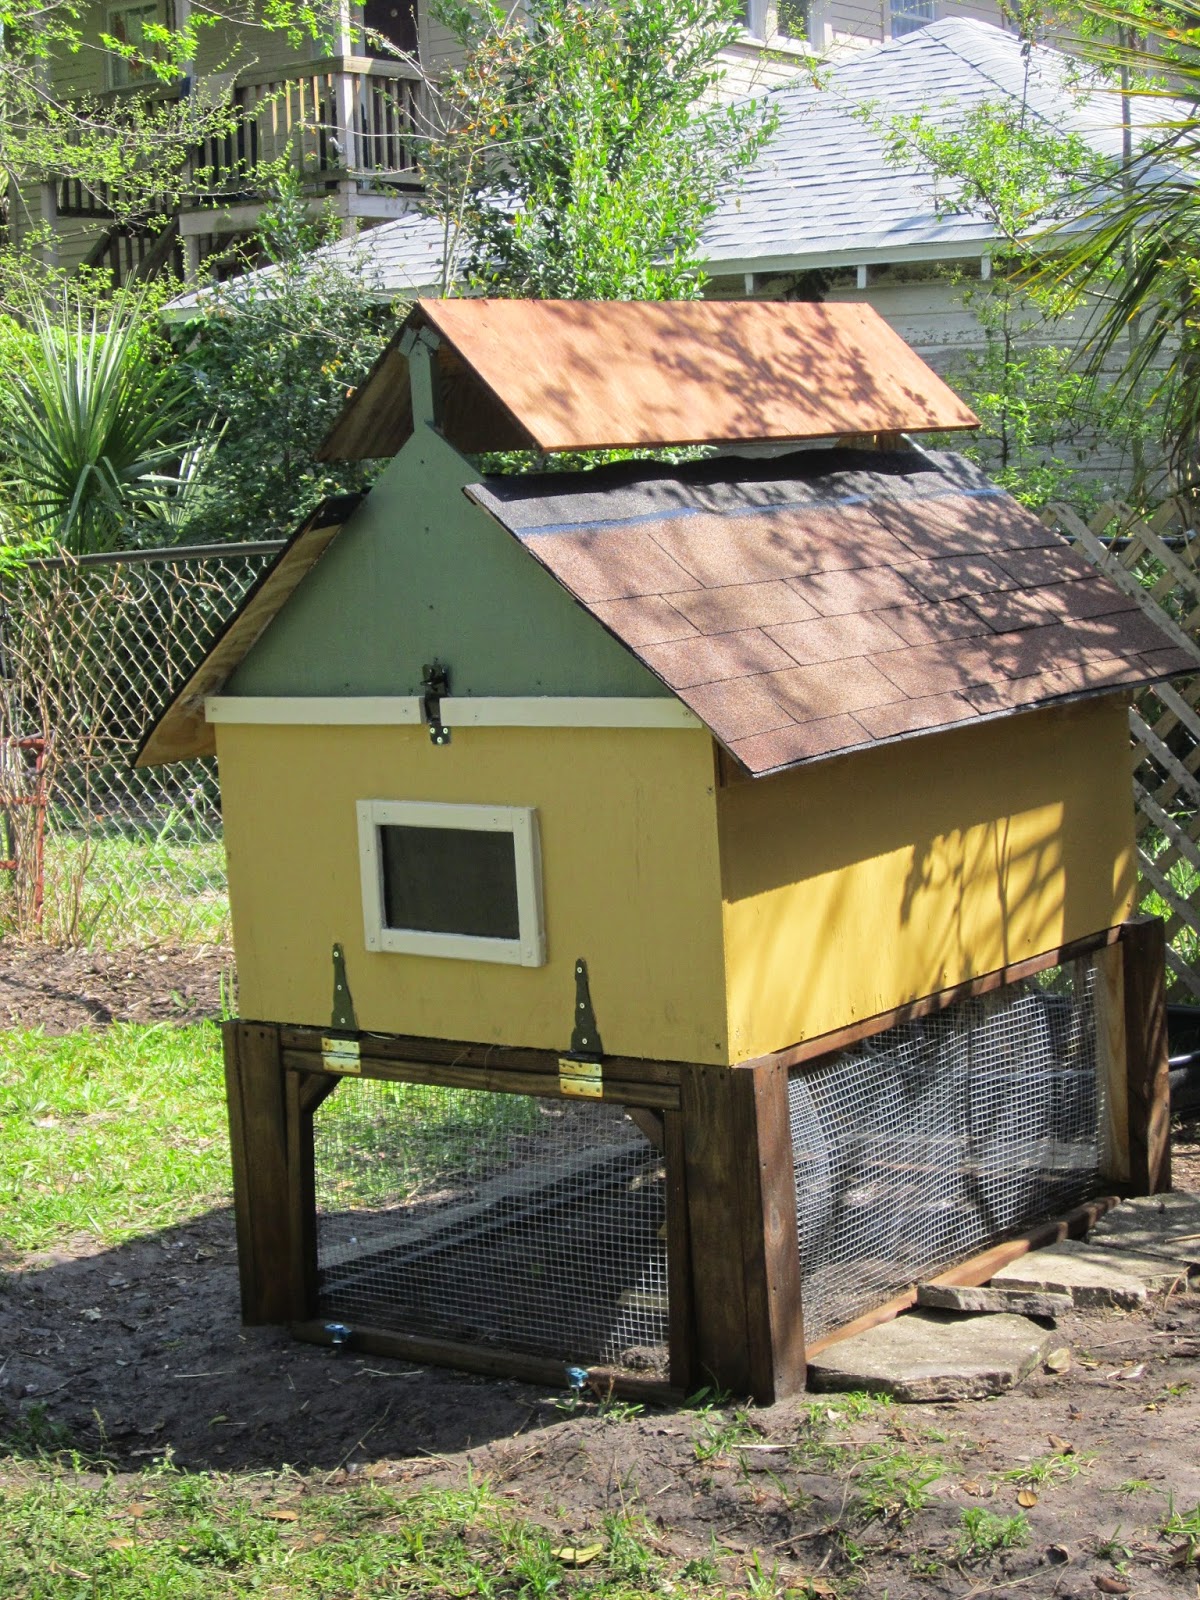
We've been building stuff - chicken stuff! After our peepers moved into their happy little brooder box, we got started on building their home in the back yard to make sure it would be move-in ready when they were old enough.
It started, of course, with a trip to the blue box to buy lumber and hardware.
Our chicken coop design consists of two stacked boxes, one framed out and with a roof to go on top, and the other one open with hardware cloth as an easy, breeze run, measuring 3'x4' and thus creating a whopping 24sqft of living space for our five ladies (more than the required 15sqft).
Plans all finagled out, we got busy cutting, and my Christmas present - the new compound miter saw - really came in handy! Loving my newest toy!
Then husband got real antsy to play with my new toy and I was delegated to take care of the are of the backyard that would house the coop. Moving the new structure into a place that's in direct line of the kitchen window (Chicken TV!) and five feet from the property line, meant our yard needed a bit of rearranging.
The African irises came up as did the Lantana and the Hibiscus to be replanted in a different area. The plywood board was used to determine the exact location for our coop.
And while I was happily digging in the dirt, Little Man and the husband started building the coop.We created a frame on top of the plywood floor, and then covered the sides with strips of plywood.
I got sidetracked and didn't take too many in-progress pictures but we cut out a trap door from the floor to create a doorway for a ladder down to the ground level, added nest boxes by dividing the front into three 12" sections using cut-offs from a couple of old boards we'd kicking around, and added a roof with vent.
Here it is in all its unpainted, unfinished glory! It's still missing its paint job and the roof vent cover, but it's in its proper place and looking good. I was most impressed by the fact it didn't feel like we just sacrificed 90% of our remaining yard - there is plenty of space around it to play with the dog, have friends over, pitch a tent in the middle of the yard, lounge in the sun, what have you. Sure, I'd like a bigger yard - the only thing I'd like to change about my house - but after mowing and weed-wacking, I'm not sure I really do want a bigger yard. Ha!
Anyways, as you can see the front has some sort of locking contraption and you can see hinges as well. That's because the front folds down for easy access to the next boxes (so we can steal eggs quickly), and the bottom front of the run folds up, so we can rake out chicken poop and , well, access the run part. It's all solid and heavy and not going anywhere!
This is what it looks like when you fold down the front. You peek right into the three nest boxes. Three is more than enough - rule of thumb is one box per five hens - but the math worked out this way and they'll have a choice. Since Silkies don't roost quite like other hens do, we added a low and removable roost to the inside of the coop (it's the block shape in the center). In the back you can see the chain that opens and closes the trapdoor down.
Since our coop design was inspired by the SmartCoop, we included the folding roof, i.e. the roof folds up on both sides for easy cleaning. After reading various articles and books on bedding, I decided on using sand (and so far it's worked beautifully!).
Here it is, primed and ready for paint! On top of the vent cover is Ferbie, our porch kitty, who just couldn't quite figure out what it was we were building and what it was for. She sure did not appreciate the addition of the roof vent cover because it messed up her resting spot (obviously sitting in the sharp edge is not as comfy as lounging on hardware cloth). Primed it looks like a cute little barn and for a moment I was tempted to leave it that way.
However, we decided it would be a great opportunity to test our house color scheme on a small version first and see how we liked it.
So the frame of the run was stained dark-brown (should have done that first before adding the hardware cloth, but it did turn our okay), the lower half of the coop was painted a lovely golden aka "SW Bosc Pear" (it's not as yellow as it looks in the picture; it's my camera messing with you, I swear!), and the top a soft sage green aka "SW Oakmoss", with a creamy "SW Antique White" trim.
So far, we haven't grown tired of the color scheme - phew! We may have a winner, but we definitely have a chicken coop!


No comments:
Post a Comment