
 [Before: No denying this sink has seen some years ...]
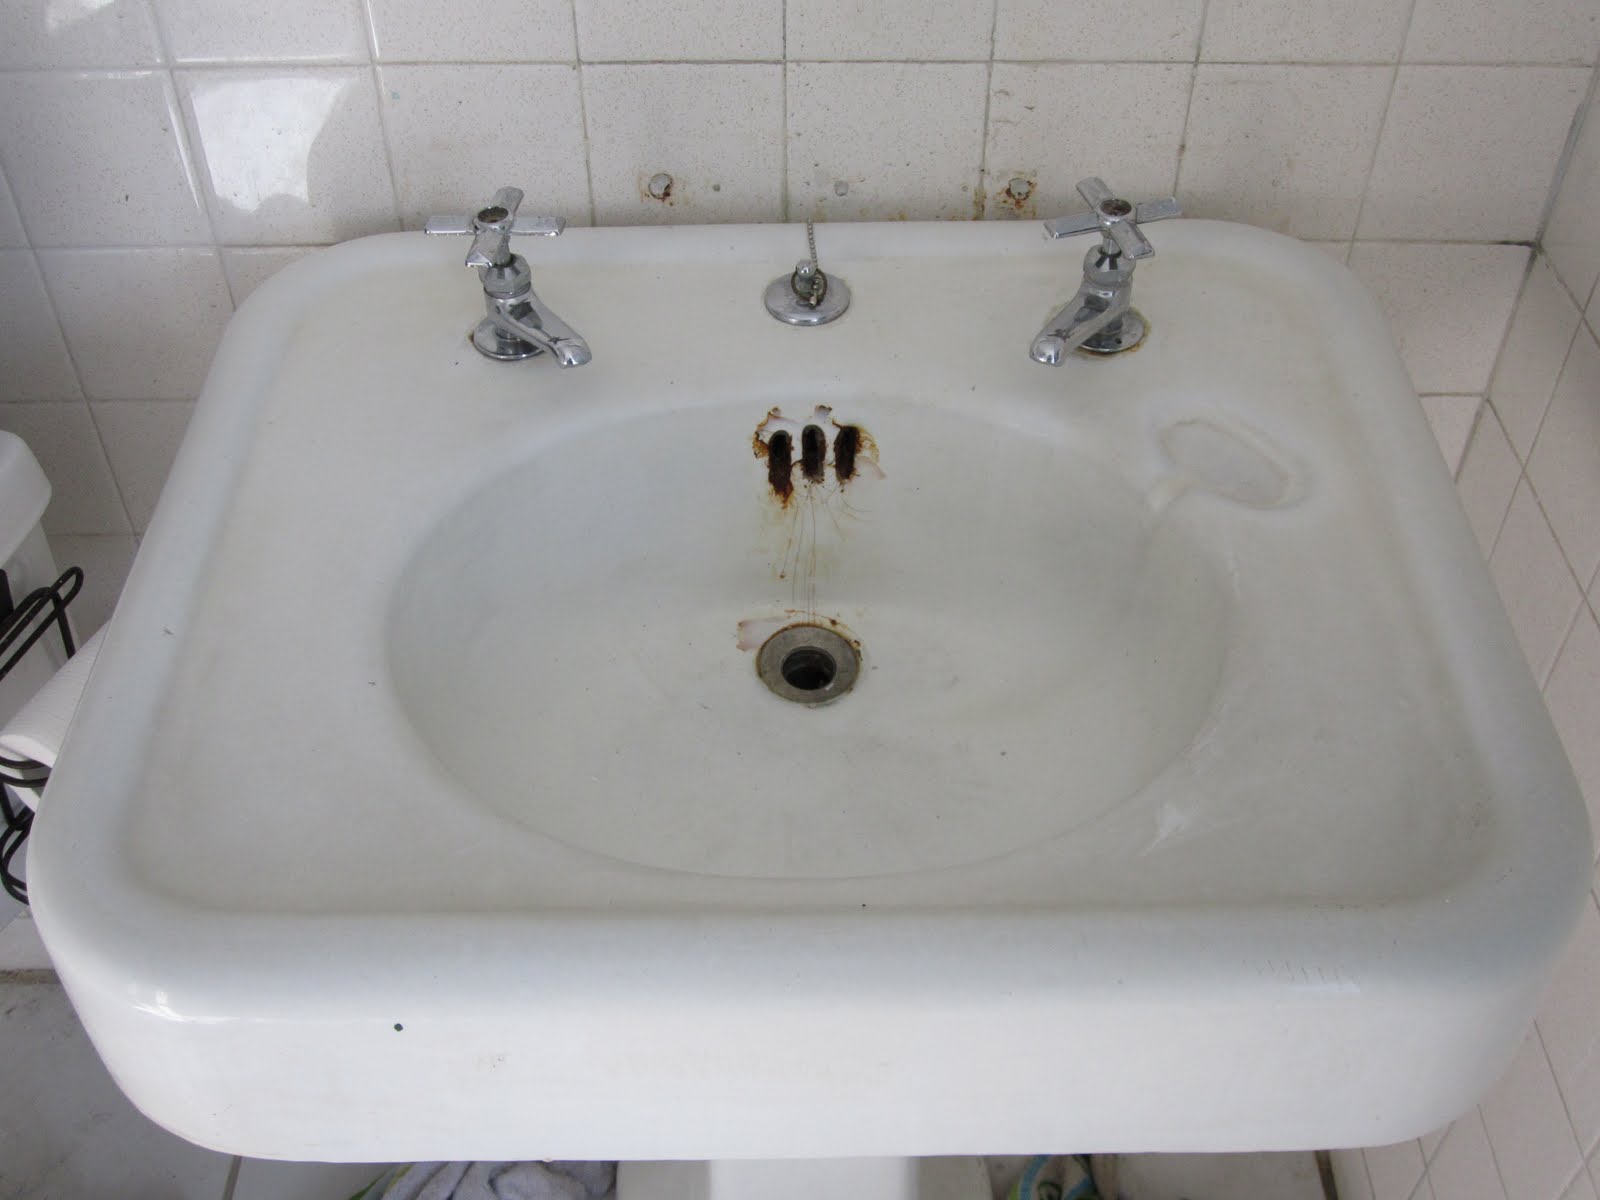
While overall in pretty decent condition, our sink had seen a couple of hundred hand- and tooth-brushings and those years had taken its toll on it. There were scratches and rust and all kinds of other telltale signs of age and use. Still, a pretty cool vintage sink and well worth saving.

During a recent run to the box store I picked up one of these kits on sale for just about $30. trying those kits was definitely worth a shot, and I could hardly pick up a new sink for $30 anywhere, right?
 [Step 1: Thorough cleaning]
The instructions were very simple and straightforward. First, a through cleaning and scrubbing with TSP followed by an overall scouring with fine steel wool to roughen the surface (yeah, I didn't think it needed anymore of that but did it anyways).

Much to my joy, the product comes as a spray paint. Woot! I'd gotten plenty of practice using spray paint over the past couple of months so my confidence went up a couple of notches; I could do this!
 [In-progress: Surrounding areas taped off and the first coat sprayed on]
I taped off the surrounding areas with a big plastic drop cloth, wrapped up the taps, totally forgot about that thingamajig that the sink plug attaches to and went a-spraying. It went on like a dream and was such an easy feat that I included the top edge of our bathtub that showed the telltale signs of a then attached and now removed shower enclosure
 [After: Like new!]
 [After all of it: All nice and shiny!]
The vintage sink now looks like new, and so does the tub. This was definitely a project for the win, even if it meant that we couldn't use the sink for the three days it took the finish to fully cure. So far, the finish is holding up really well. You're not supposed to use any harsh chemicals and/or scrubbies on your refinished surface (and if you wipe it down regularly you really shouldn't need to) nor train or duel Beyblades on it, but, hey, that's easy enough!
Hi - I'm wondering how this is holding up? Have a sink in need of some help, and I hesitate to use one of these products without hearing from an actual person who has used it.
ReplyDeleteHey!
DeleteWell, it's been three years and I think it's time to redo it. It started flaking in a couple of spots, mostly around the drain. Not unexpected but definitely sooner than if we'd gone the professional route. Then again, it's at a fraction of the price. Would I do it again? Yep! Hope this helps :)
Thanks so much for your speedy reply. Guess I have some things to consider. Blessings to you...
Delete