To top it off, the in-laws will be visiting in just two weeks and nothing inspires and invigorates quite like the tight deadline of the impending arrival of guests, especially the kind of guests that will notice any kind of progress ...or lack thereof. Ahem ...
So, rather than starting yet another BIG project, I've been busy putting a couple of finishing touches here and there. As you may have noticed we have hit that dangerous level of "almost done." All of our rooms are in that stage of "almost done" where they are usable - comfortably so - albeit not finished.
Maybe the trim needs a second coat of paint.
Per chance an outlet cover is missing.
Perhaps we should install the light fixture.
You know the drill.
Invariably you will run out of steam at some point during your restoration/renovation. No shame in that - we all do it to some degree. I bet a lot of my neighbors know exactly what I'm talking about... heh. Anyways, since our bathroom is the room with the most recent activity (I changed the color scheme of master bath, master bed and dressing room to create a more cohesive unit rather than a string of rooms), I buckled down and added a few minor finishing touches.
Like escutcheons.
The very pinnacle of little finishing touches.
E ...what?
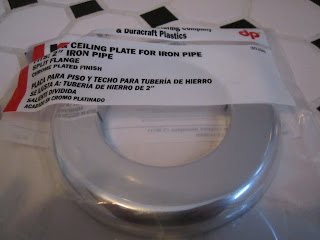
Escutcheon. The little ring that frames plumbing sticking out of walls or floors (or the plate around a key hole, that's also an escutcheon... and the shield shape in heraldry).
There was the case of the drain pipe of our clawfoot tub that was missing its escutcheon. Nothing pressing, nothing life threatening, but definitely one of those things that separates
Tharr she blows ... unceremoniously the drain pipe dips into the hole in the tiles. Not like you'd see it when you're standing but hey, there are times when crawling and bathroom happen at the same time.
Anyways ...
I went and got an escutcheon at the blue box for a whopping $4 and some change. These babies here are plastic and feature a little per-perforated slit for an opening so you can just slide it over your pipe.
With a little bit of twisting and wriggling you slide the escutcheon over the pipe and voila! the drain pipe vanishes in the tile with a bit more style!
I did the same thing using smaller escutcheons on the hot and cold water pipes and the drain pipe of the faucet in less than 10 minutes.
Ta-da!
(Just why on earth does it always take that long until you get around to it?)
Next was the area where our new tile met the floor of the closet. Yep, until we can find a door that fits or can be made to fit the not-so-standard size of our odd bathroom closet, I hung a quick curtain with a tension rod. Clean and simple (and another one of those "less than 60 minutes" projects).
Yeaaah, not cool. The fix was equally simple, inexpensive and quick.
During the same shopping spree at the blue box I'd picked up a simple seam binder threshold. I measured the opening, cut my seam binder to sized (I even shaped it with my Dremel tool to make it fit exactly into the opening following the outline of the trim) and screwed it in with the included screws.
All better!
So here is the remaining to-do list for the master bath:
- buy and install light fixture for vanity (in progress; need shades)
- buy and install new ceiling light
- install shower curtain rod
- decide on window treatment
- find art
- decide on shelving/storage solution
- adding wainscoting
- removing the ceiling and exposing the rafters (that's not scary - what is scary is that husband thinks that's a really cool idea)


No comments:
Post a Comment