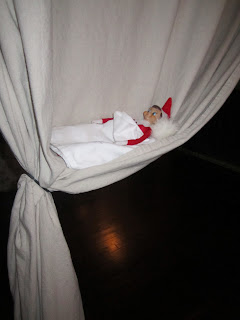
Monday, December 31, 2012

The Only Bread Recipe You'll Ever Need

Thank God for Pinterest! And bread.
Especially bread.

I'm not sure if I ever mentioned it (and I'm clearly missing an "About me/us" tab) but I'm a German mail-order bride Expat living in sunny Florida. While my inner lizard enjoys living far away from cold snow and gloomy rainy days tremendously, there are a couple of German things I do miss almost every day, like my family and good bread.
Bread with a crust.
Bread with a velvety airy soft inside.
Bread with flavor.
Bread with texture.
Bread with a backbone that can't be compressed from a full-sized loaf to the size of a tennisball.
Good bread.

Bakeries that bake this kind of bread I grew up with are far and few inbetween and every single German expat I have met so far has at one point or another gotten into baking their own bread. Baking good bread is an art, but unfortunately we don't always have time to bake us a Van Gogh or a Renoir. Sometimes, that craving for bread needs a quick fix.

Thank God for Pinterest!
This is where I found the link to "Alexandra's Kitchen" and her mother's peasant bread (recipe link here).


It calls for a total of -5- ingredients: flour, salt, sugar, yeast and water, and makes the most amazing bread ever in just about -3- hours.

No kidding.

Since then I/we have sworn off store-bought bread entirely and I bake a batch every two or three days. It's a great tasting neutral bread that can easily be made more fun by adding extra ingredients like

- oats as a sprinkle on top for a great crunch and extra rustic look
- raisins or cranberries mixed into the dough for a sweeter bread without having to add more sugar
- chunks of fresh garlic mixed into the dough and topped off with s sprinkle of Rosemary for a hearty   
  garlic bread
- nuts of any kind mixed into the dough(walnuts, pecan, hazelnuts) or as a crusty topping

So so good!

Thank you, Alexandra, for sharing this terrific recipe! You saved my life!

Saturday, December 29, 2012

Christmas at the Ugly Duckling

 The holidays went by in a whirl: together with my in-laws we celebrated "Pre-Christmas," a week early since due to weird work schedules (my father-in-law is a pastor and my husband a journalist) we weren't able to meet up in the north for a family gathering this year on Christmas. Instead, they came down to see us in bright and sunny Florida. Together we went hunting for a Christmas tree, decorated it, spent lots of time chatting and playing boardgames, and in good old family-tradition nearly an entire day unwrapping Christmas presents.

A week later, just the three of us here at the Ugly Duckling celebrated Christmas again, going to Midnight Christmas Mass at First UMC downtown, woke up amazed that Santa had come -again- and brought some more presents, and savored family time galore over new boardgames and a long and tasty fondue for dinner. I feel wonderfully re-charged and assured in God's love and his blessings for us. Life cannot get any better than this. I am loved and I am blessed many many times over.


Friday, December 28, 2012

Oh no, you didn't!

 Oh yes, I did.

When I last showed you the hot mess that is/was my dressing room aka walk-through closet, it looked like this:


Hot hot mess.
Tools scattered every which way. Paint cans. A shop vac. And much much more.
The "in-between" stage - when tools clutter every inch, and nothing is where it belongs - is always the scariest.

While at first I really really liked the stenciled floor (because it was different, a pattern that I liked, and probably because a painted floor was on the "It" list across the blog world), it was never ...well, me ...or us. We -are- fairly traditional, and somehow the floor always struck me as 'noisy' once the initial excitement over "Hey, I painted my floors!" had faded.

I don't like noisy rooms. Not at all.

And while we didn't want to start laying floors a week before Christmas and only days before the arrival of the in-laws for Pre-Christmas celebrations, I just couldn't suffer this noise anylonger.

What more is another gallon of paint?
Certainly no pearl from my crown (this is an attempt to translate a German saying that basically expresses the thought that it's not too much to ask to do a certain task).

Warning - Wet Paint!
Barely half a gallon of self-priming porch paint in a rich chocolate brown color later, peace and quiet arrived in my little walk-through closet/dressing room.
It also appeared instantly larger.


Once the paint was dry later that evening, my dresser went back into its old corner, conveniently hiding (most of the) the kitty bathroom. Once we have decided which type of new flooring to put into our bedrooms, this room's floor will be finished as well but for now I'm pleasantly surprised and happy with the new look. So is the husband.

To-do-list:
- separate from bathroom
- lay new flooring
- install shelving
- frame with baseboards
- paint walls
- paint ceiling
- install light fixture
- frame out windows
- hang window treatments
- art/painting
- rug

Getting there, getting there ...

Thursday, December 27, 2012

More Elfcapades


 Barrigade, newspaper and tape - What could he possibly do with that?

 Tape over Little Man's bedroom door, of course!


 Ahem .... balloon adventure


 Such a clever elf - he helped wrap presents!


Beards are for Santas! Elves obviously favor a clean shave

This is our second year with the elf and just like last year, Christmas comes with a bitter-sweet good-bye for Little Man. He thoroughly enjoys B's elfcapades and pops out of bed  early in the morning to find out what our elf has been up to, and so saying good-bye often comes with a few tears. I promise you he's already counting the days until next year when 'Barrigade' arrives bright-eyed and bushy-tailed on December 1.

Wednesday, December 26, 2012

Elfing around the Christmas tree

I can't quite believe that Christmas is over already and that it will be another year until we find our trusted elf "Barrigade" wring mischief about the house again. Here are a few more pictures of this year's adventures and pranks


 Cozying up with the Skylanders.


 B. leaving notes using 'Oliver', the restored 1917 typewriter.


 Cookies!!!
 Gett
 

 Traveling to and fro the North Pole is tiring work!


 Super Barrigade!


Playing Knight in Shining Armour!

Monday, December 24, 2012

Merry Christmas!


From me and mine
To you and yours:

Merry Christmas and a Happy New Year!

Tuesday, December 11, 2012

Let there be light!

Look what the husband did when I was out playing one of Santa's elves!

He - wait for it! - installed a ceiling light fixture in our dressing room!
And took pictures!
And showed Little Man how it's done!

This project was brought to you by my bestest brother-in-law B. without whom this wouldn't have been possible ...well, not anytime soon, at least. You see, we live a solid 2.5hrs drive away from the closest IKEA store, all highway miles, mind you. Best Bil, however, lives in town with IKEA, and he graciously agreed to swing by with our shopping list and deliver to our door. (He's cool that way ...and he is single. You know, in case you're looking...)

For the dressing room, we settled on the ALÄNG light fixture from IKEA - a modern design with a sweet texture, flush mount for our low-ish ceilings in the addition housing dressing room and master bath and a very affordable price to boot!


Here the husband took a picture of the contents of the IKEA box: shade, fixture, and instructions.


This UFO shaped contraption is the actual fixture, the antennas have little magnets that hold up the shade. No worries, the magnets are surprisingly strong and the shade is holding up really well (and has yet to come down).


Ahh, here we go. There's the hole in the ceiling covered up with an oh so fabulous cover plate ... yeah. Yep, we painted the ceiling in the dressing room the same soft minty blue color like our bedroom.
Ugly Duckling Southern Style!


And here is Little Man lending a helping hand! And you get a better idea of the ceiling color, too! Ignore the splotchy door frame in the background; it's a work in progress, and I'd just started to patch and sand.


It's the Millennium Falcon! On my ceiling!
Well, alright, so it's the light fixture all wired into place and ready for some bulbs and a light shade.


Voila! We have a ceiling light! Ignore the rest!


I warned you! The rest is still a pretty (pretty as in "very")  hot mess. Ceiling and walls have been painted, I'm in the process if installing the remaining base boards, and we have plans for the floor, window treatments and accessories.
Until that's finished, we can always close the doors and pretend it's not there. Right?

Monday, December 10, 2012

The Reveal

It's been two weeks since I introduced those babies to you (read about it in this post here). We were in sore need of more seating in our living room which until then had only been featuring a three-seater couch. After adding a tufted back, squeaky-yellow but oh so comfortable litte arm chair we knew we were on the right track but unfortunately it was nigh impossible to find anything that matched or team up harmonically with said yellow armchair. Now what?

That's when those two chairs walked ...err, were carried into our life thanks to our lovely neighbor.
 Two -matching- chairs with surprisingly modern, clean lines.
Score!
For free!
Mega Score!

Only the green and worn burlap-y kind of upholstery fabric just wouldn't do, and since I had spied similarly shaped chairs upholstered in velvet and our living room could use some bling, that's what I ordered - 6 yards of silver-grey velvet.
A DIY blog isn't a real DIY blog unless you have spray painted something (check!) and upholstered an old chair ...
In hindsight I should have ordered a heavier, upholstery weight fabric, and time will tell how well this lighter velvet will hold up to the daily abuse of a house full of boys and animals but so far, so good.


There are some really good and detailed tutorials out there on how to upholster a piece of  furniture so this won't be yet another one. In the end it's a rather straightforward process:
  1. take fabric off
  2. remove all old staples, tacks, etc.
  3. use old fabric/foam as patterns for new fabric
  4. put new fabric back on in reverse order
 Take pictures as you go for reference in case you hit a point when you aren't quite sure how things go back together, and things will be golden. No, really.


Removing the old fabric took seemingly forever, well, at least for chair No.1, since I was taking pictures of the process to document the construction and because I was being extra careful to preserve the rather brittle fabric to use as pattern for the new fabric.
It was also a rather messy process, especially when I revealed a layer of foam (?) that had disintegrated into fine orange dust. The stuff was -everywhere-! and I sneezed orange for hours afterward. Yuck!


Once all the old stuff was removed, it was clean slate time! I'd originally hoped to preserve the foam/batting but after revealing the orange powdered mess underneath, I started fresh and bought new foam and batting. It felt good to put the new materials on the nice, solid frame work (the second chair had a few minor wobbly leg issues that I fixed with four strategically placed screws. easy-peasy!)


Here's the back of chair one coming back together: a layer of foam, a layer of batting doubled up, and then the fabric.


 For the tufting of the back, I needed buttons and since I was on a roll I decided to reuse the old buttons. I cut small circles from the new fabric, sewed a quick running stitch along the perimeter and so, created a little round pouch into which I slipped the old button. All done!


Looking good! The tufting on the first chair turned out much nicer than the one on the second one, much to my dismay. Spacing the buttons evenly wasn't quite as easy as I expected it to be, and since the fully fasten the fabric of the back -after- the tufting, the tufting got pulled out of position a bit more than I expected. It's not bad -bad-, and there is only one button that is ...ahem, somewhat out of line, but side by side you see the tufting isn't exactly spaced the same way. It's good enough though. I can live with it.


 Another in-between step was creating piping since that was the design detail that defined the chairs so beautifully (It was either that or nail head trim). For that, I simply cut a long strip of fabric per chair (I used the selvage edge of the fabric; all 6 yards of it) and folded rope into it.


 Here is a close-up detail shot of me attaching the first round of piping to the back of the chair.


Next up the seat, foam, batting, and fabric, then the skirt around the lower edge, and finally, the back. While it took me about 6 afternoons to take apart and rebuild the first chair, I managed to whip chair No. 2 in shape in only 3 afternoons (between work, homework, Cub Scouts, and household chores).

Then, we moved them into the living room, and, gosh, are they lovely!


They are just the right height and width and perfect shape for our not-too-large livingroom, and the color and sheen of the fabric works great with our dark-grey 'restoration hardware' look we have going on in this part of our house.


And, man, they are comfortable.
Ms Inkybinky falls into a regular coma every time she sits on one.
No kidding.